Electric Interface Panel

The Electric Interface Panel is a multipurpose block exclusive to the 1.12 versions of the mod.
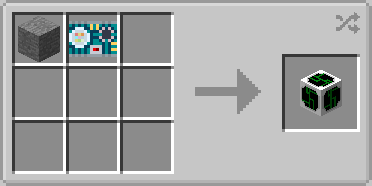
Crafting Recipe
| Name | Ingredients | Recipe |
| Electric Interface Panel |
|
|
Uses
- Transferring items between the Tardis Interior and Tardis Exterior and two positions within the Tardis Interior.
- Mimic the texture of most blocks
Usage
Transferring items
Items can be transferred between the Tardis interior and Tardis exterior or different positons within the Tardis interior dimension.
Requirements:
- Item transportation pipes or cables from external mods such as:
- Buildcraft pipes
- Xnet cables
- External mods with item transferring pipes and/or cables
- Input source - this is where the player sends items.
- Output source - this is where the player receives items.
Interior to Exterior Setup
Using Buildcraft Pipes
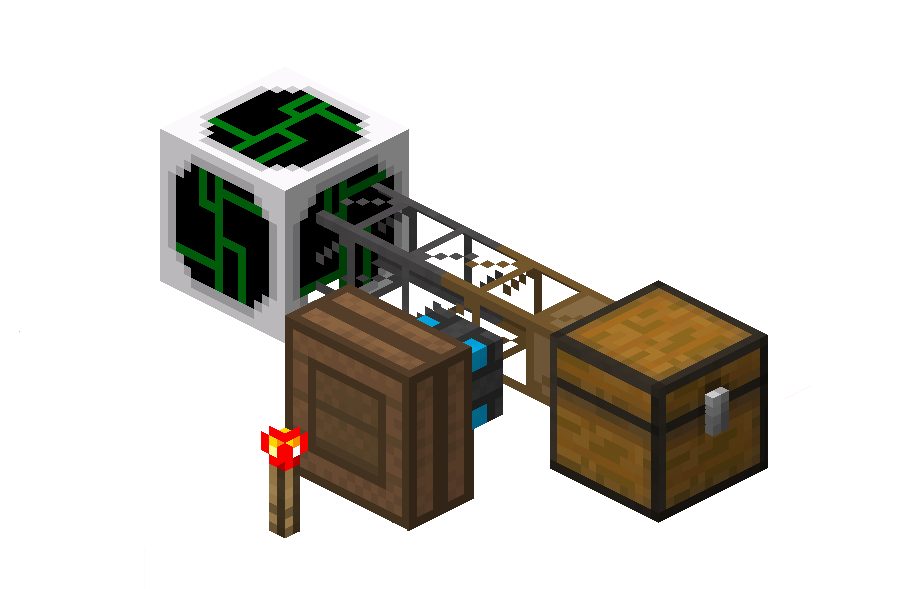 |
| Figure 1 - Example Interior setup of using Buildcraft pipes with the Electric Interface Panel. |
Starting Position Setup
- In the Tardis interior, place down a container block such as a chest. This will be the input source.
- Place down an Electric Interface Panel in the interior at least 3 blocks away from the container block
- Attach a Wooden pipe or an equivalent pipe to the container block so that it will extract items from the container block.
- The brown shaded part of the pipe extracts items from the block it is connected to.
- See the Buildcraft wiki for more information
- Place an engine such as a Redstone Engine to the Wooden Pipe
- Place a power source next to the engine.
- Connect a Stone or equivalent pipes to the Electric Interface Panel and the wooden pipe.
- Place items into the chest.
 |
| Figure 2 - Example Exterior setup of using Buildcraft pipes with the Electric Interface Panel. |
Destination Setup
- Place a container block at least 3 blocks away from the Tardis exterior. This is the output source.
- Connect a Wooden Pipe or an equivalent pipe to the top block of the Tardis Exterior
- The brown shaded part of the pipe extracts items from the block it is connected to.
- See the Buildcraft wiki for more information
- Place an engine such as a Redstone Engine to the Wooden Pipe.
- Place a power source next to the engine.
- Items should now transfer from the input source to the output source.
Notes:
- Multiple input sources can be connected with pipes into the same Electric Interface Panel
- Multiple output sources can be setup on the exterior
Using XNet Cables
Starting Position Setup
- In the Tardis interior, place down a container block such as a chest. This will be the input source.
- Place down an Electric Interface Panel in the interior at least 3 blocks away from the container block
- Attach any Xnet coloured connector to the container block.
- Attach a connector cable to the Electric Interface Panel using the same coloured cable as the previous cable.
- Place down a Xnet Controller block and connect it to the Panel-Container block network.
- Place an power source next to the Controller and connect it to the network
- Setup the Xnet network by first right clicking the Controller block. See the below instructions for further steps of this sample setup.
 |
 |
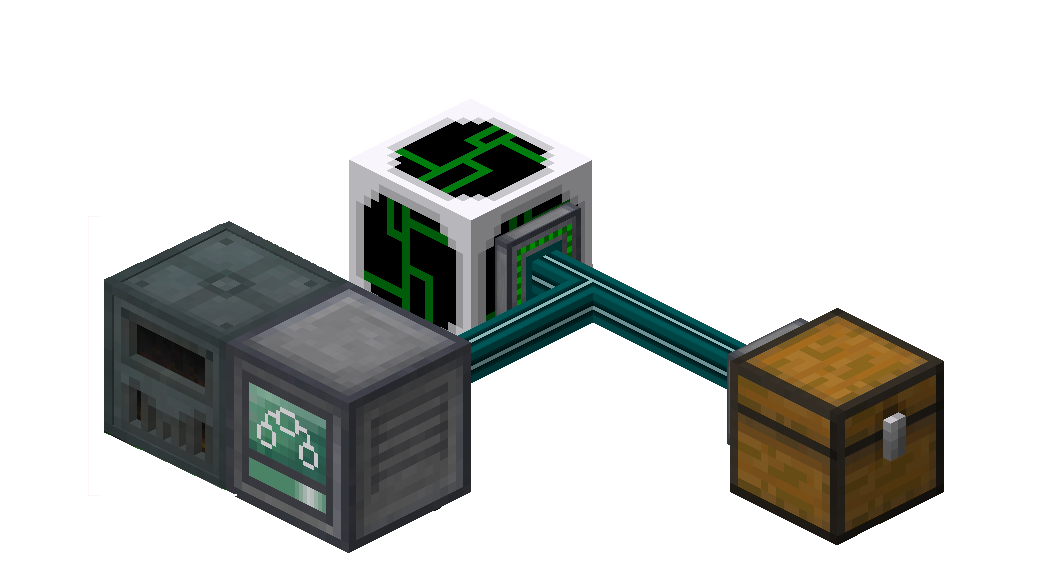
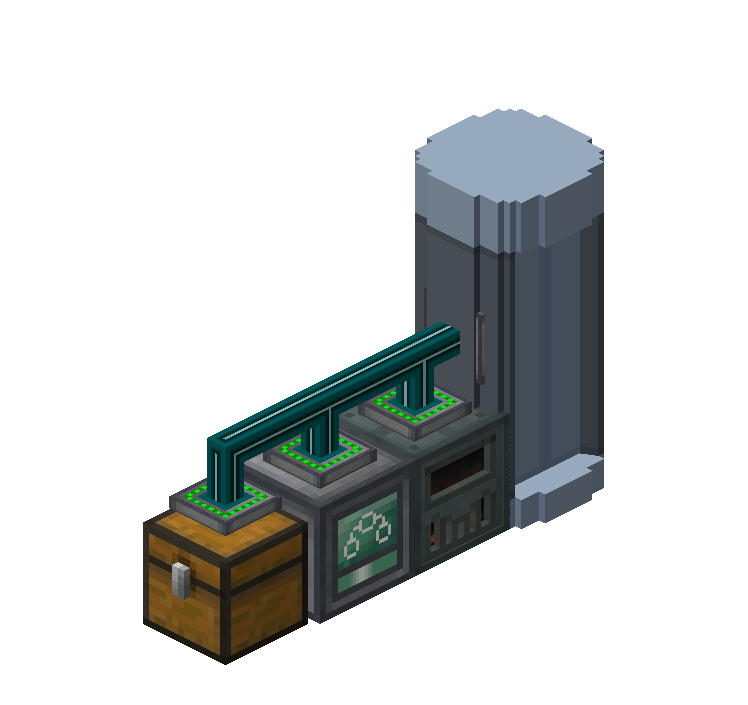
| Figure 3 - Example starting position setup using Xnet cables. This example uses an EnderIO Stirling Generator to power the Xnet controller block. | Figure 4 - Sample instructions on setting up the Xnet Controller block for the starting position setup. |
Destination Setup
- Place a container block at least 2 blocks away from the Tardis exterior. This is the output source.
- Repeat Steps 2-7 of the Interior Setup phase.
 |
 |
| Figure 5 - Example destination setup using Xnet cables. Note that an Xnet Connector block has been attached to the top half of the Tardis Exterior block. | Figure 6- Sample instructions on setting up the Xnet Controller block for the destination setup. |
Interior - Interior Setup
Transporting items to different positions (E.g. Point A to Point B) within the Tardis interior dimension is possible.
Start Position Setup
The setup is the same as the start-position setup for both Buildcraft and Xnet variants.
|
|
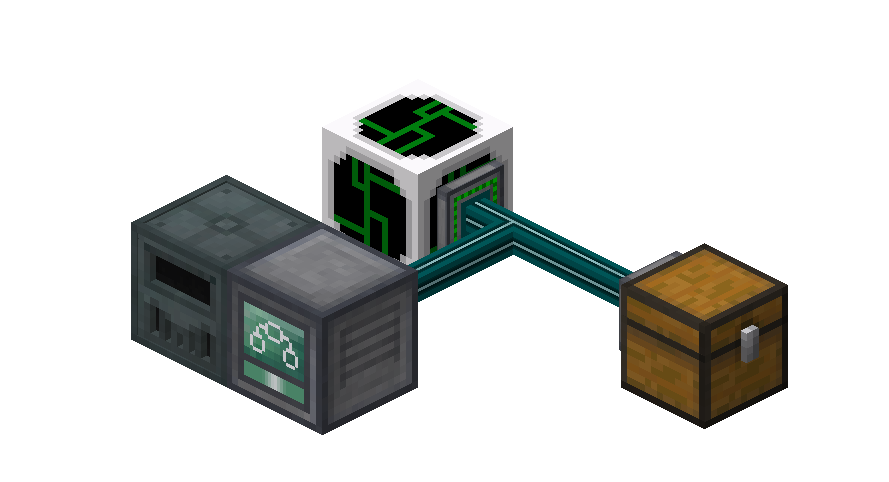
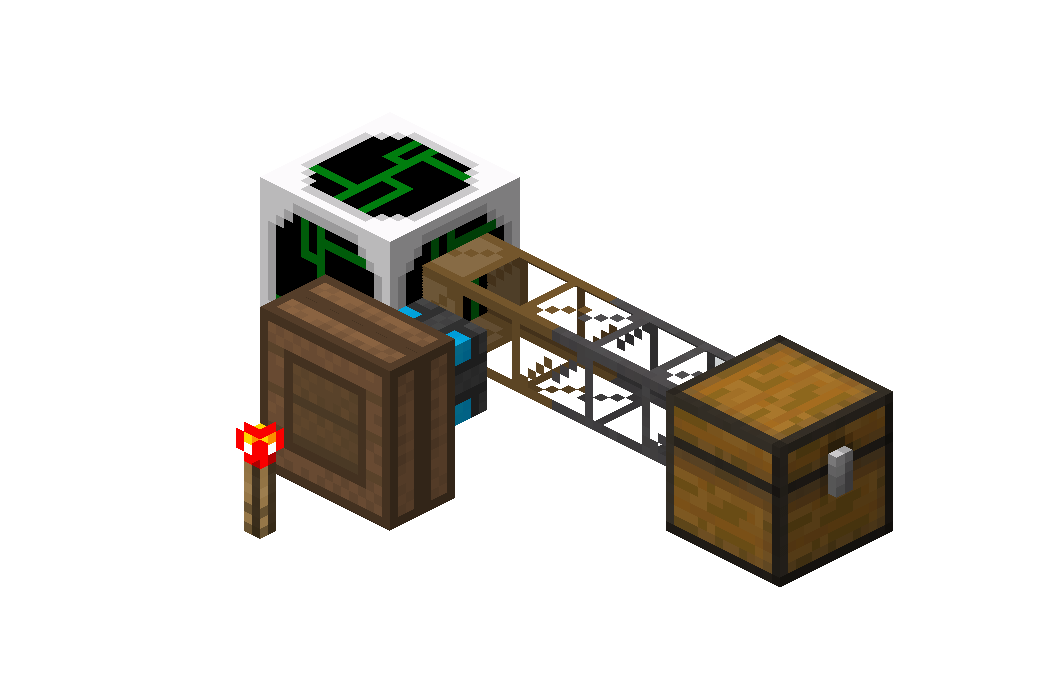
| Figure 7 - Example start position setup using Xnet cables. | Figure 8 - Example start position setup using Buildcraft Pipes |
Destination Position Setup
The setup is the also the same as the start-position setup. However, keep in mind that cables from external mods must be placed to extract items from the panel.
 |
 |
| Figure 10 - Example destination position setup using Xnet cables. The physical setup is the same as the above, but its Controller setup is inverted (Panel = extract, Chest = insert) | Figure 11 - Example destination position setup using Buildcraft pipes. Notice how the extraction point (pipe with brown colouring) is placed on the panel and not the chest. |
Mimicking block textures
- Place down the Electric Interface Panel.
- Right click the panel with a block. The aforementioned block will be used up and the panel will be able to use its texture.
- If the block being mimicked outputs light, the electric interface panel will mimic its light source.
|
Figure 12 - The Electric Interface Panel can mimic a variety of block types |