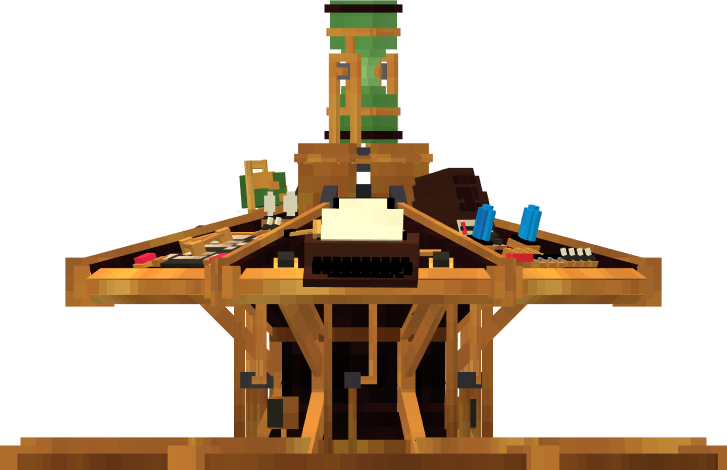
Tardis Console
The Tardis Console is a block that is essential to the operation of the Tardis.
This article helps explain the way this block influences how the Tardis behaves
Purpose
Storing Data
The Console block holds all of the data of the Tardis. It controls many aspects of the Tardis such as:
- Holds and stores Tardis Control Information
- Exterior Position
- Mood and Emotion Levels
- Fuel
- Exterior, Interior and Console Looks
- Waypoints
Usage by Players
Refrain from modifying/deleting the Console
Because the Console block stores all the data, it CANNOT be moved or broken when a player is building over it.
If the Console Block is modified incorrectly or deleted, it will RESET all previous data This will not crash servers, but it means the Tardis' position will be set to 0,0,0. To prevent the player from being thrown into the void once this occurs, the player will need to fly the Tardis to a different location.
Building Interiors
All Tardis Interiors must be designed to be offset from the Console Block to allow for good geometry. Because the Console cannot be moved in anyway, interiors must be designed around the Console Block.
Features
Animated, Entity based Controls
The Console Block spawns multiple Control entities that are shown in the form of levers, buttons on the model.
Below: An early version of the Tardis console. This demonstrates the animations in place.
Model Variants
The Console Block can be customised to display different model types.
The controls are placed differently for each model.
To Change the Console Model, do the following:
- Right click a Tardis Monitor
- Select Change Console
- Cycle through the list with Next and Previous Buttons
- Press Select to set the model of the Tardis Console
Texture Variants
In addition to model variants, the Console block can also be adjusted to use a texture variant for the same model.
To do this:
- Right click a Tardis Monitor
- Select Interior Properties
- If the model has a texture variant, press the "Set Texture Variant" button to cycle through the variants
- Exit the gui to see changes

