Creating Wiki Assets
This article showcases the current methods used to standardise and maintain quality control of assets used across the wiki. Assets can include image renders of items, blocks or entities and more.
Extraction of Mod Assets
In order to provide renders of the mod's assets, the original model and texture files must be obtained. All assets are readily available through the GitLab Repository within the subfolder src/main/resources/assets/tardis.
An exception to this are Entity models. These models are only available through contacting the mod authors.
- Models files are located under
src/main/resources/assets/tardis/models - Texture files are located under
src/main/resources/assets/tardis/textures
Images
Blocks
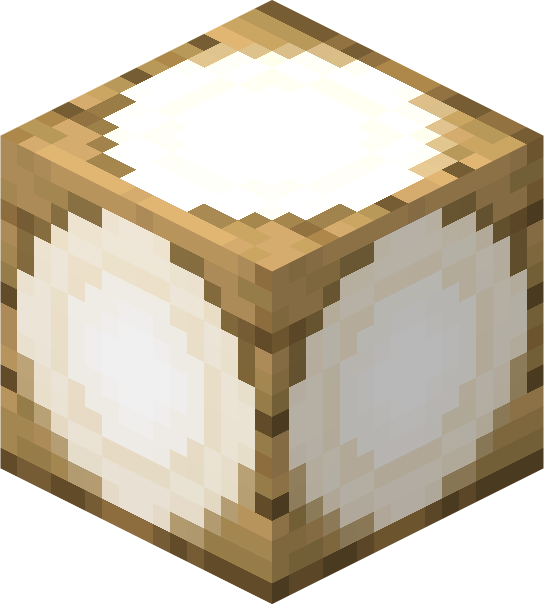
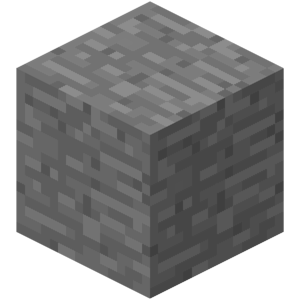
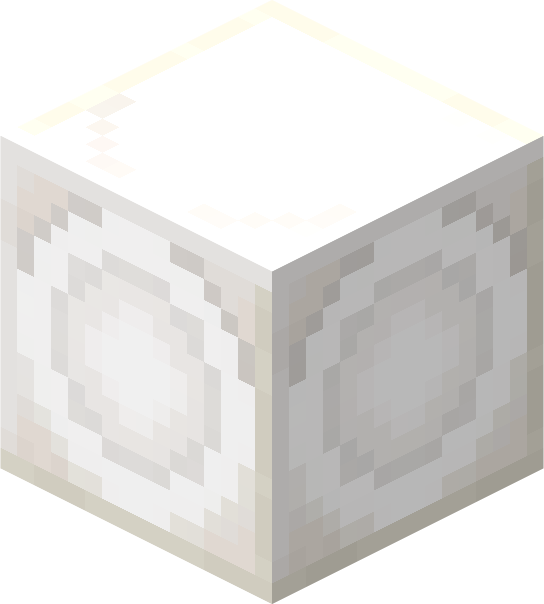
Image renders of blocks featured in the Tardis Mod use Third Angle Orthogonal Views to display the block. It can entail the use of Blockbench or Blender along with the extraction of mod assets from the Gitlab Respository.
An example render is the below image render of a Wooden Roundel.
Blockbench Render
The simplest way to render a block involves using a premade model in the Blockbench program. This uses BlockBench's Java Block/Item Model type and allows all block model types to be rendered, including non-cube block types which can be found in the Minecraft client.jar file.
You can also export models into obj files to be used in Blender afterwards.
Model Creation
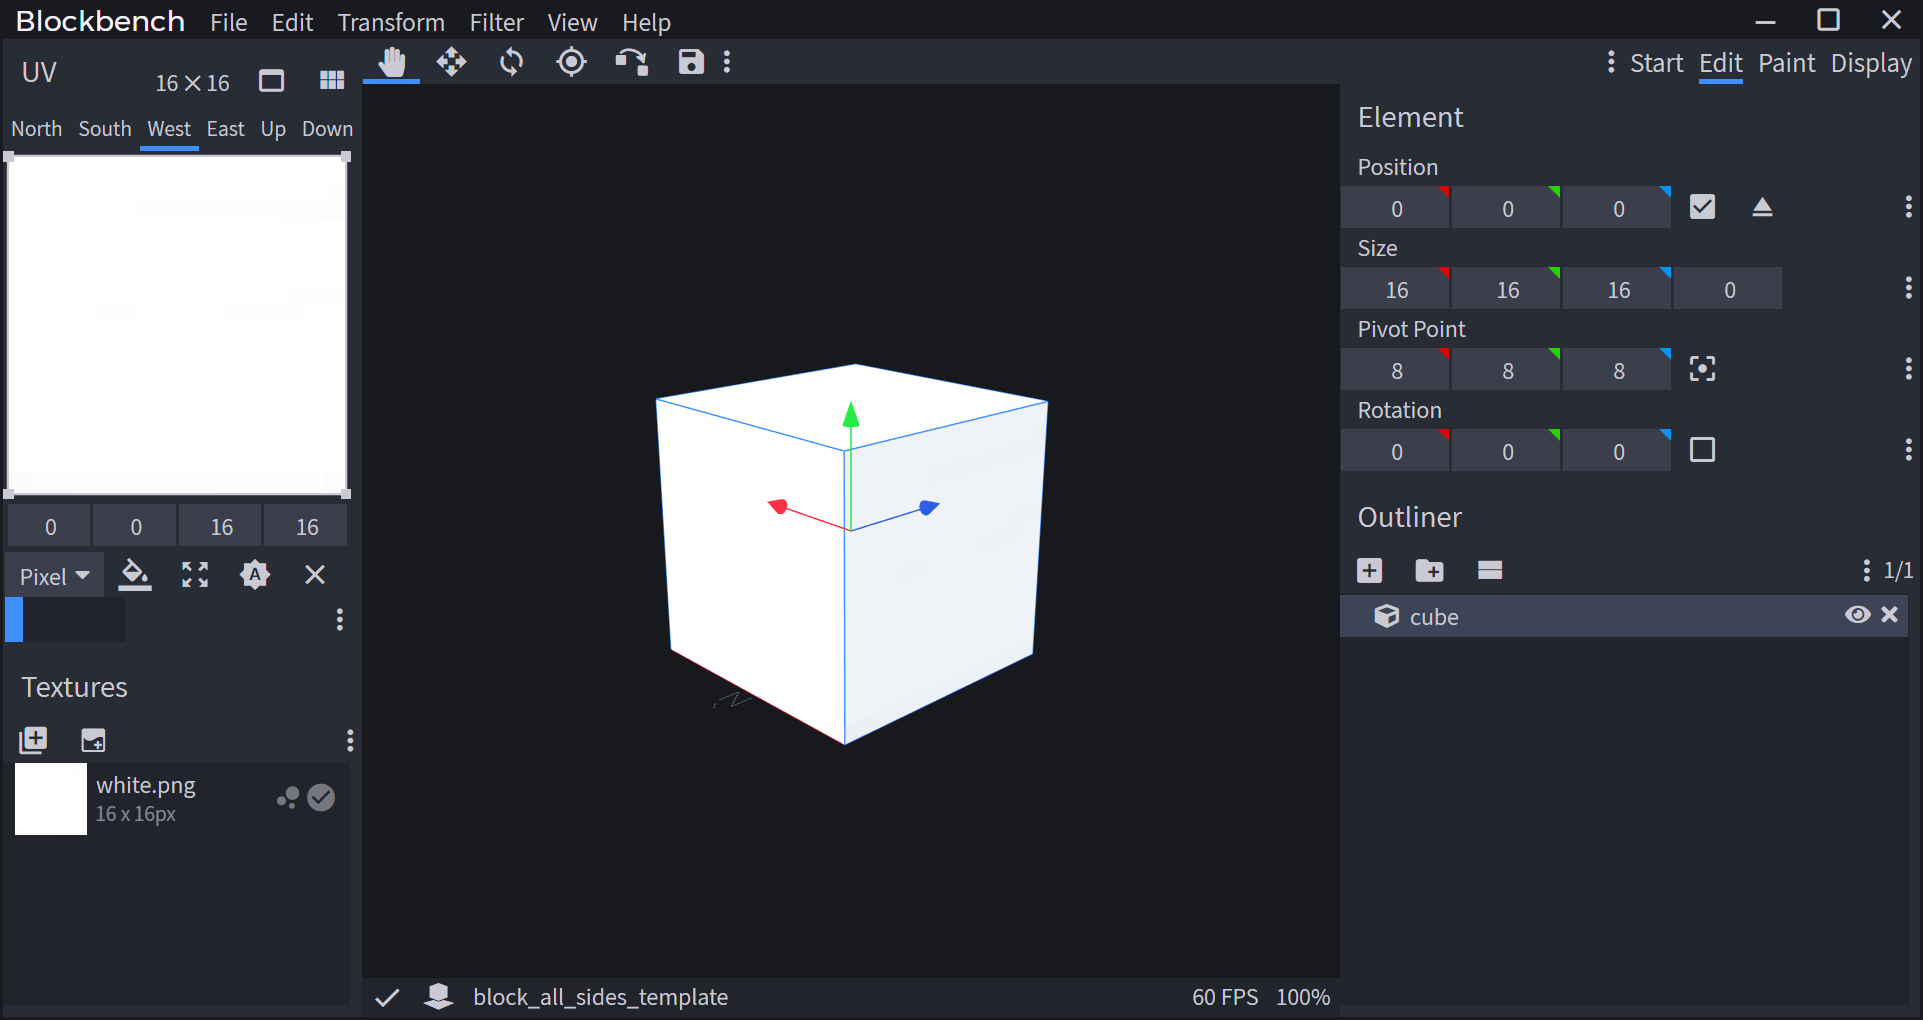
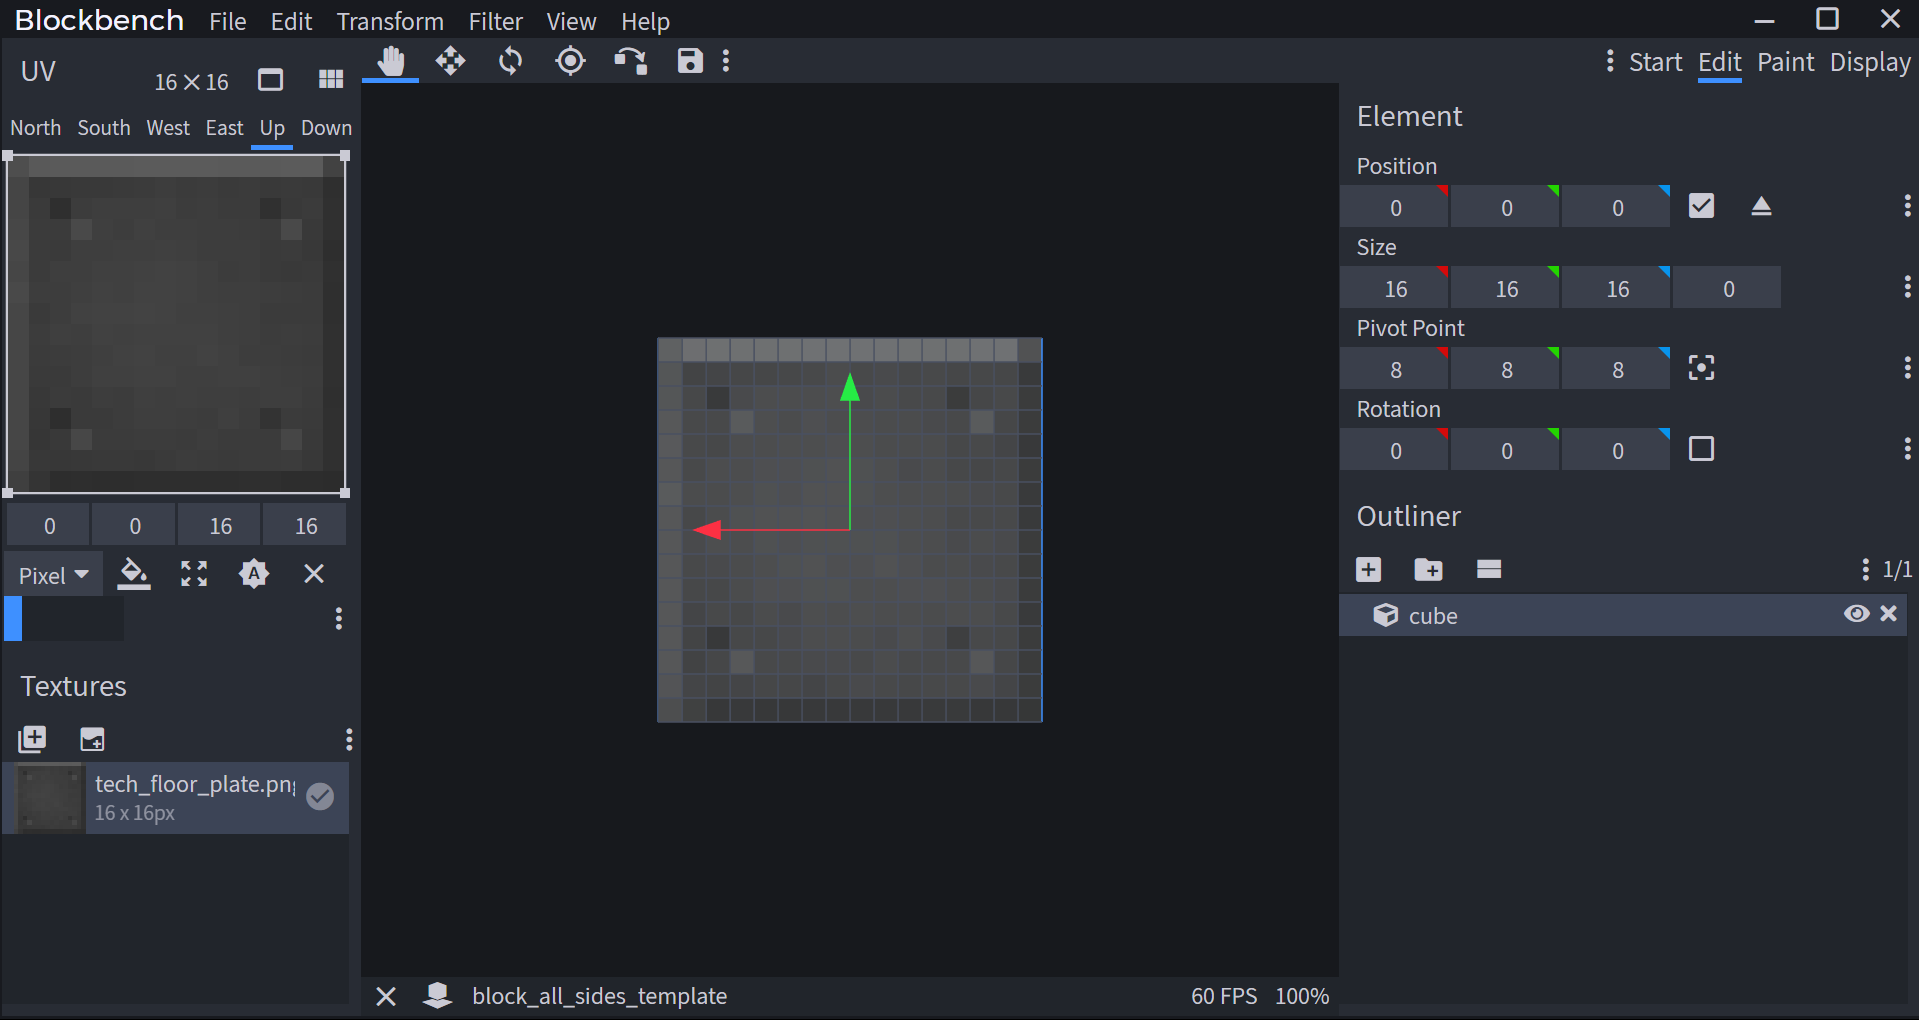
- First, a 16x16x16 cube model is created. This model can be modified to allow for different faces to use seperate textures, or for the whole block to use one texture.
Importing Texture
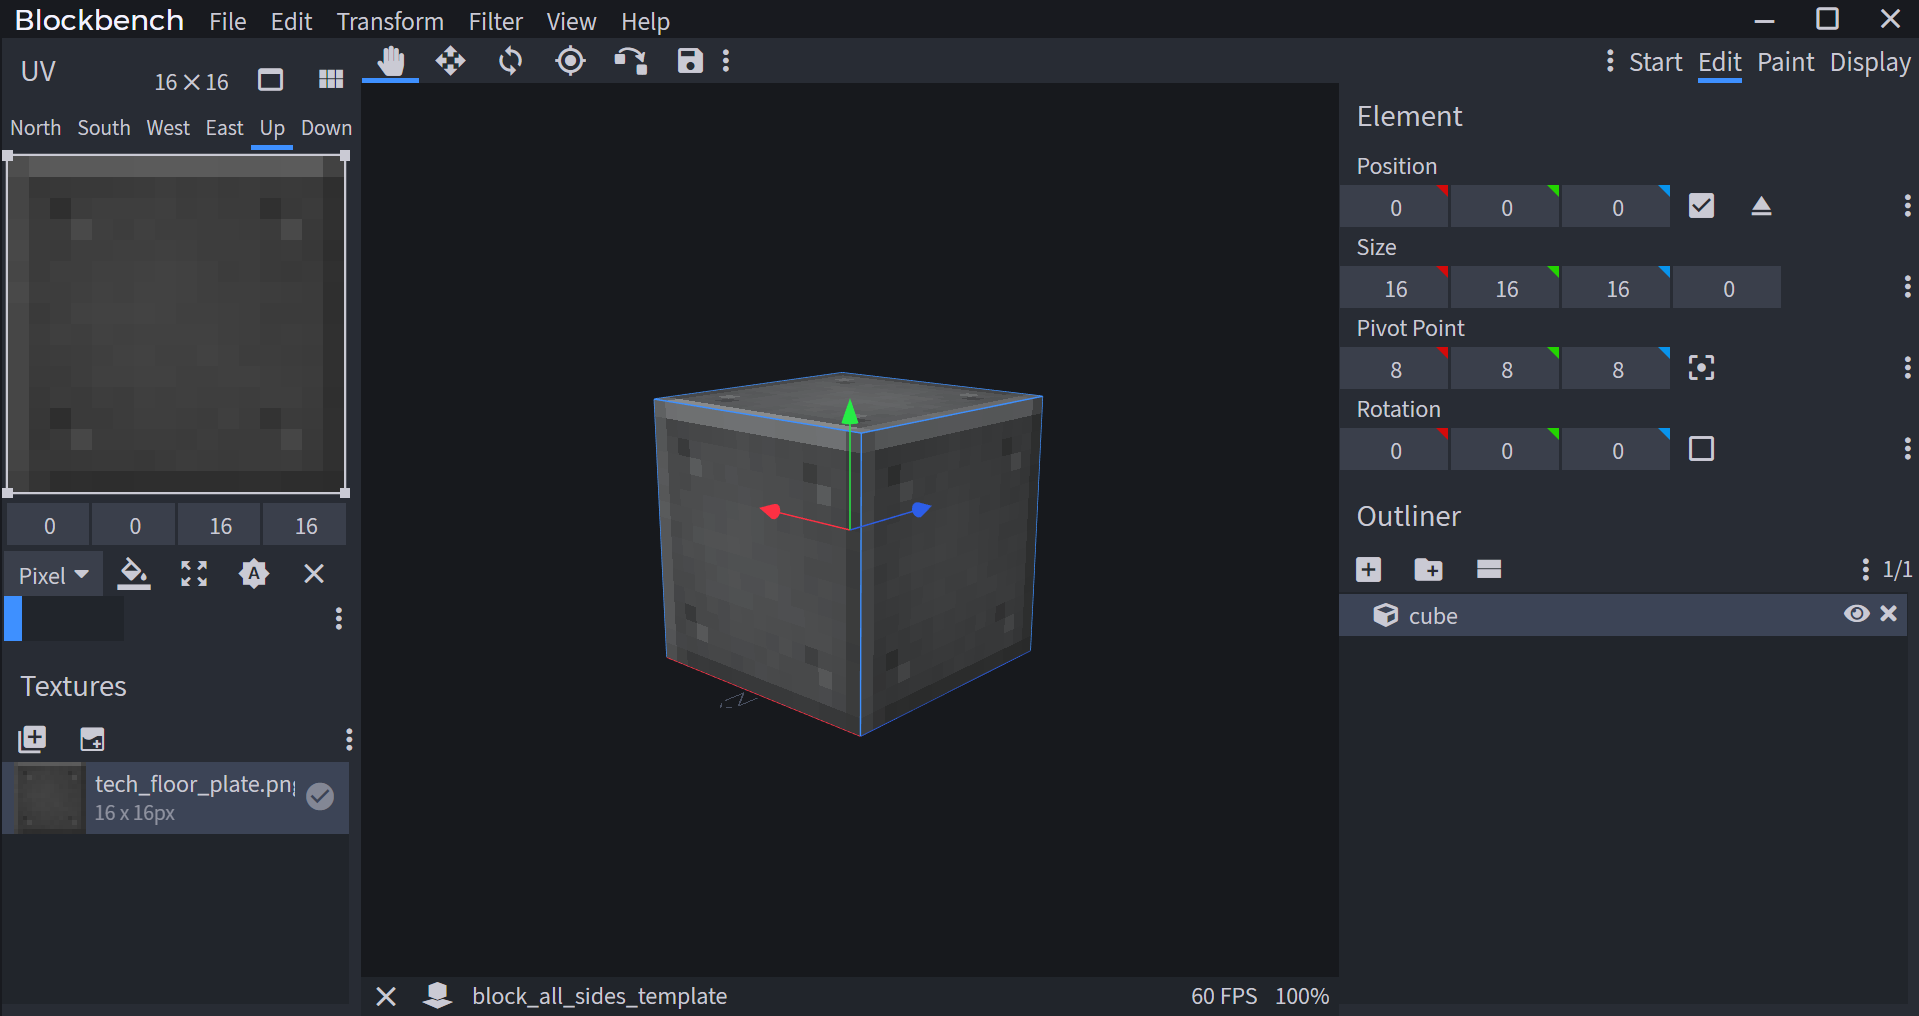
- Then, a texture is imported into Blockbench and applied to the desired face of the cube model.

Rendering
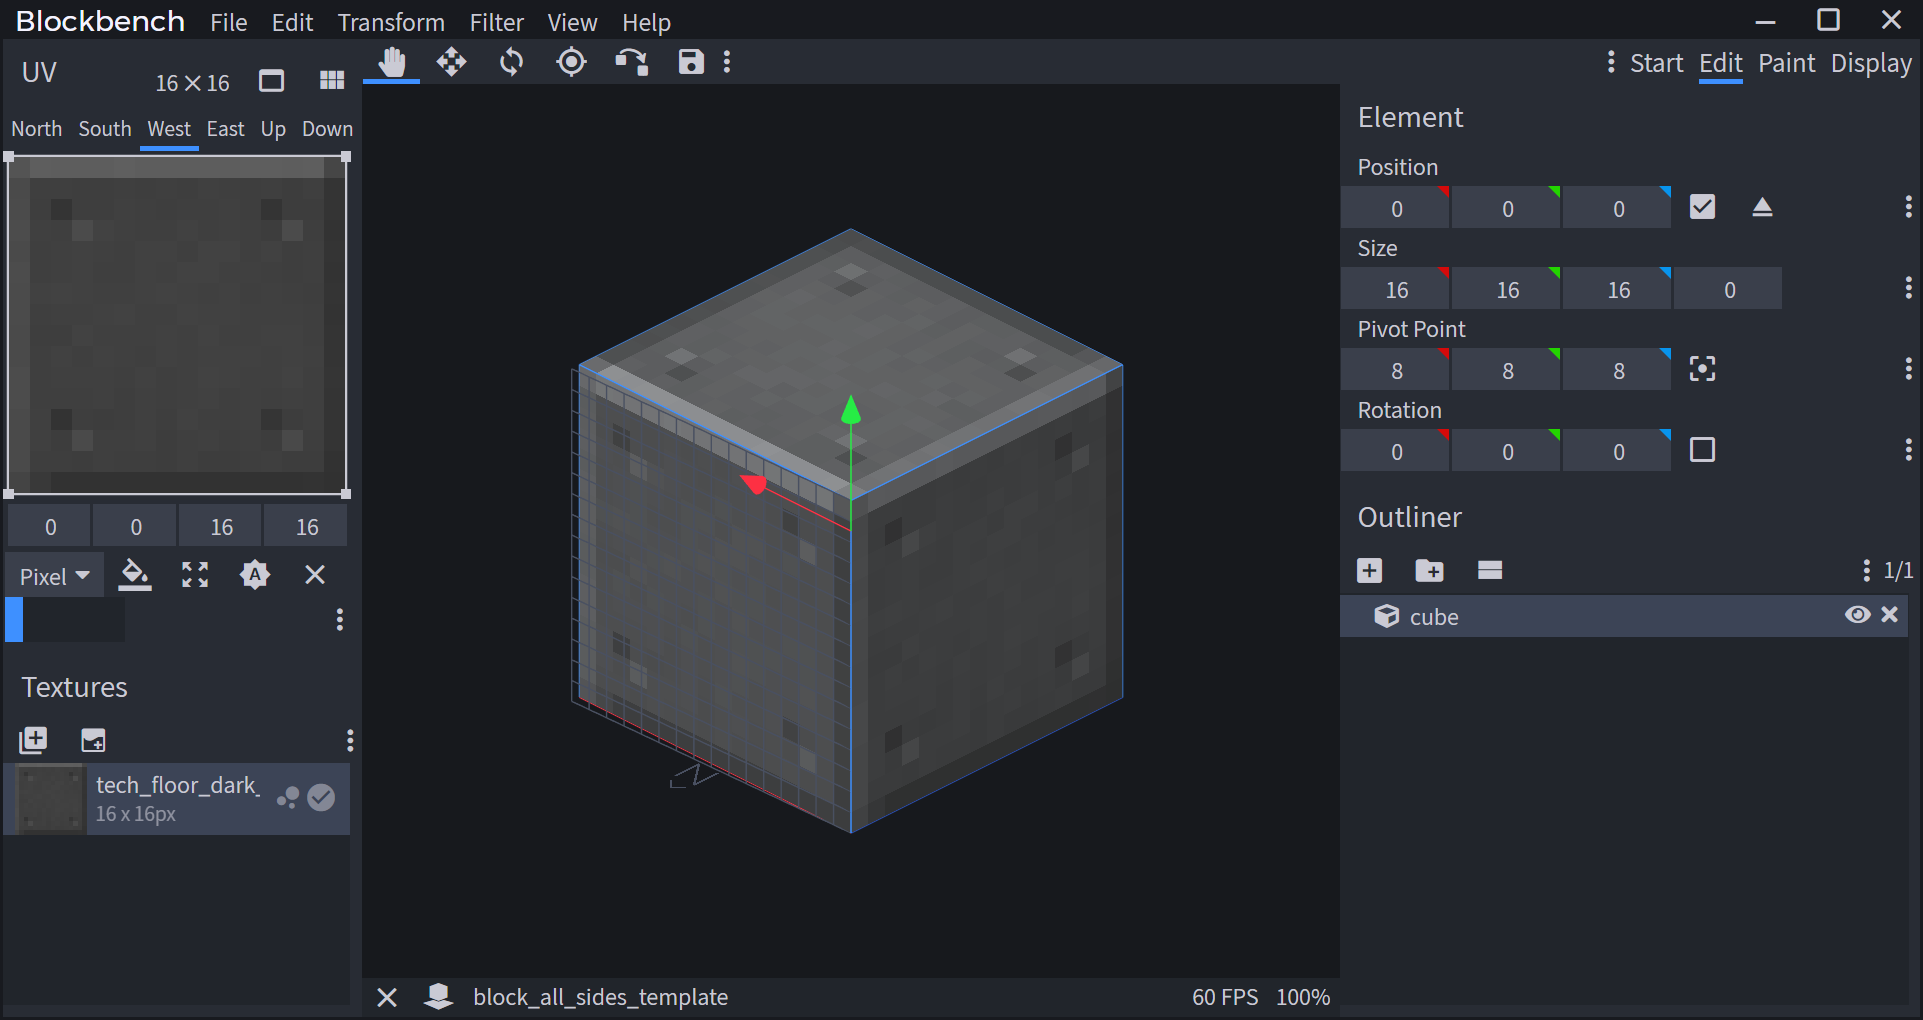
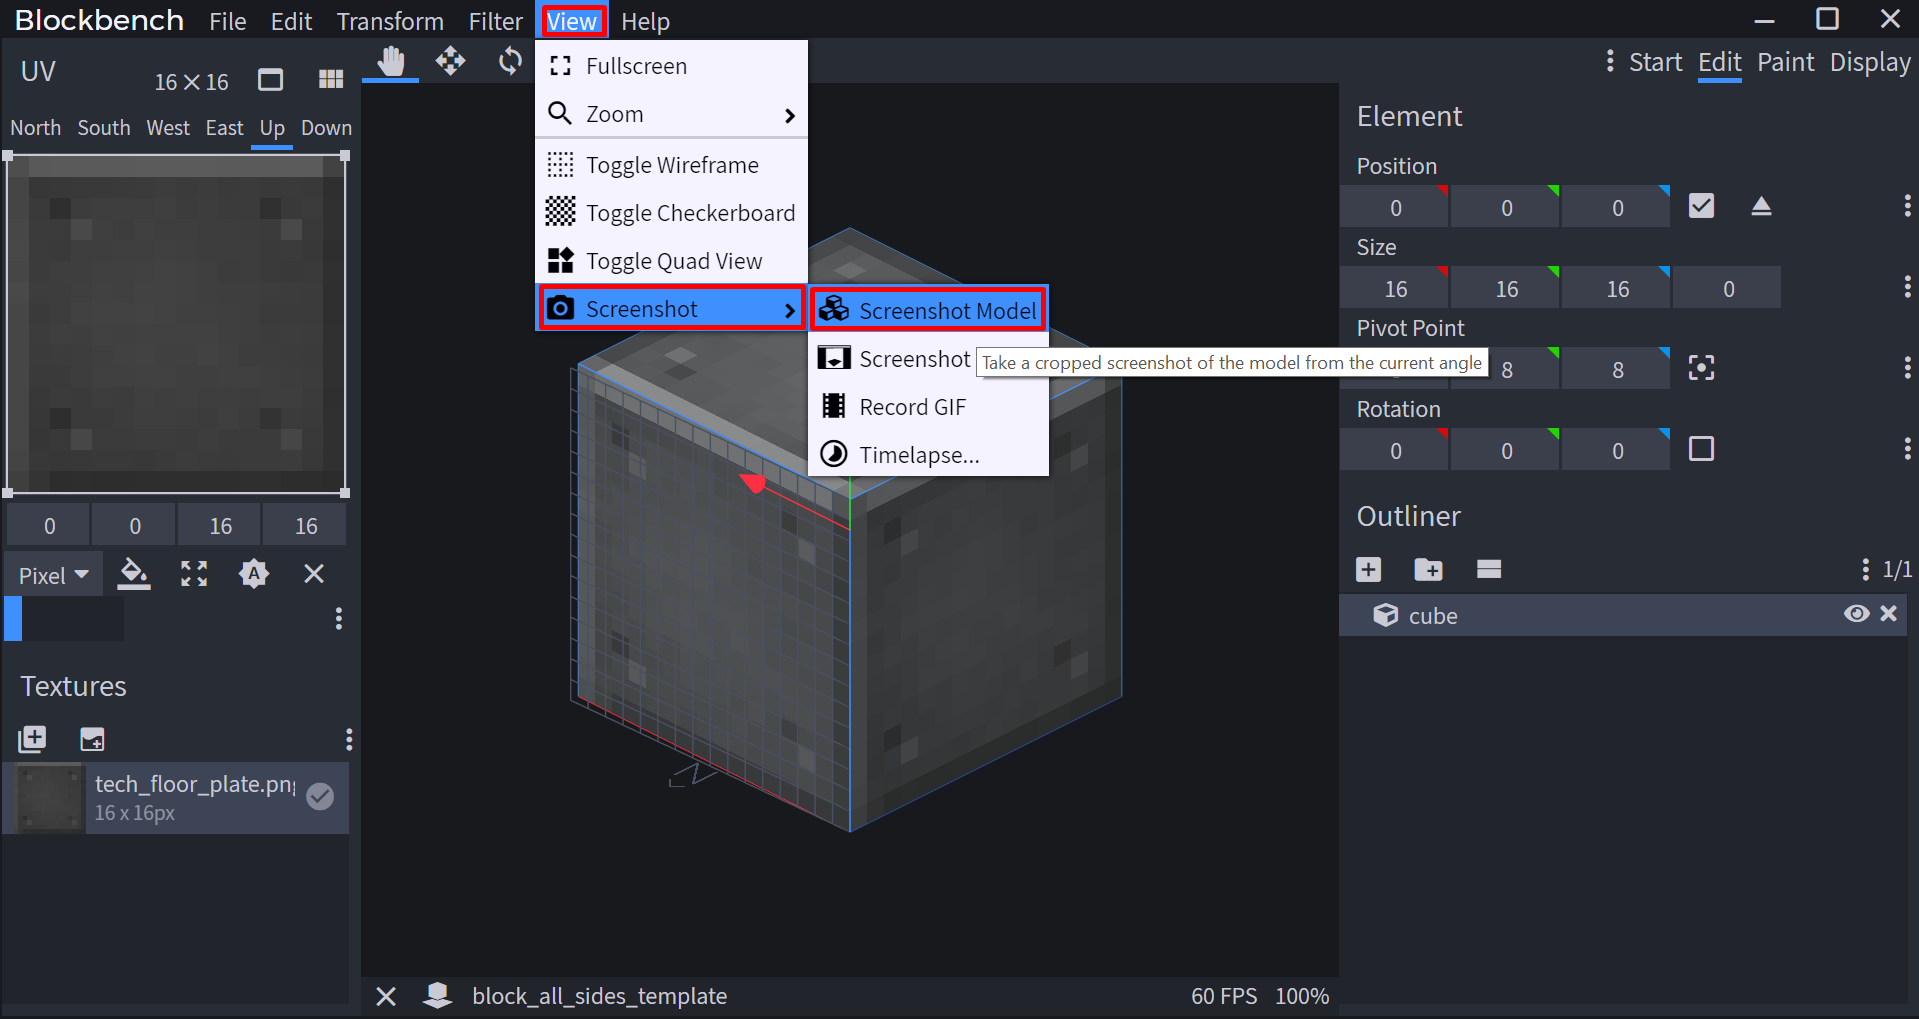
Rendering before Blockbench 3.5.0
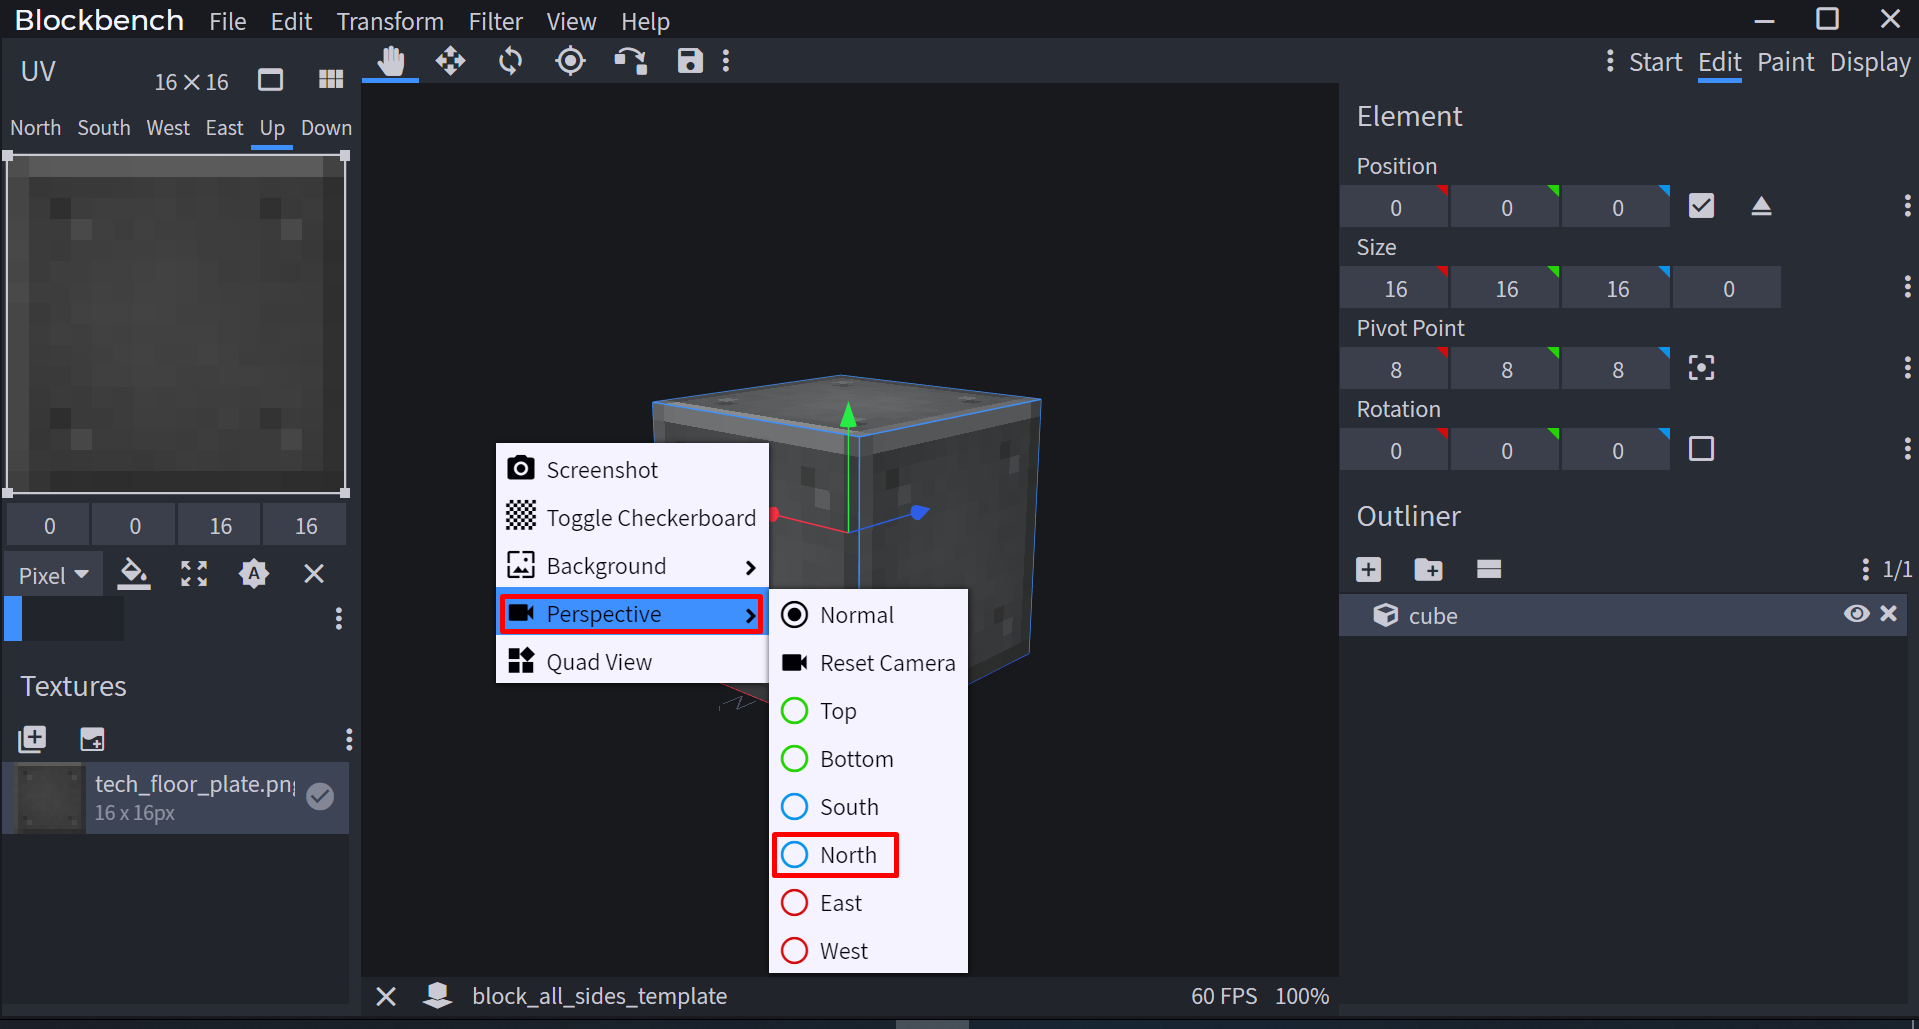
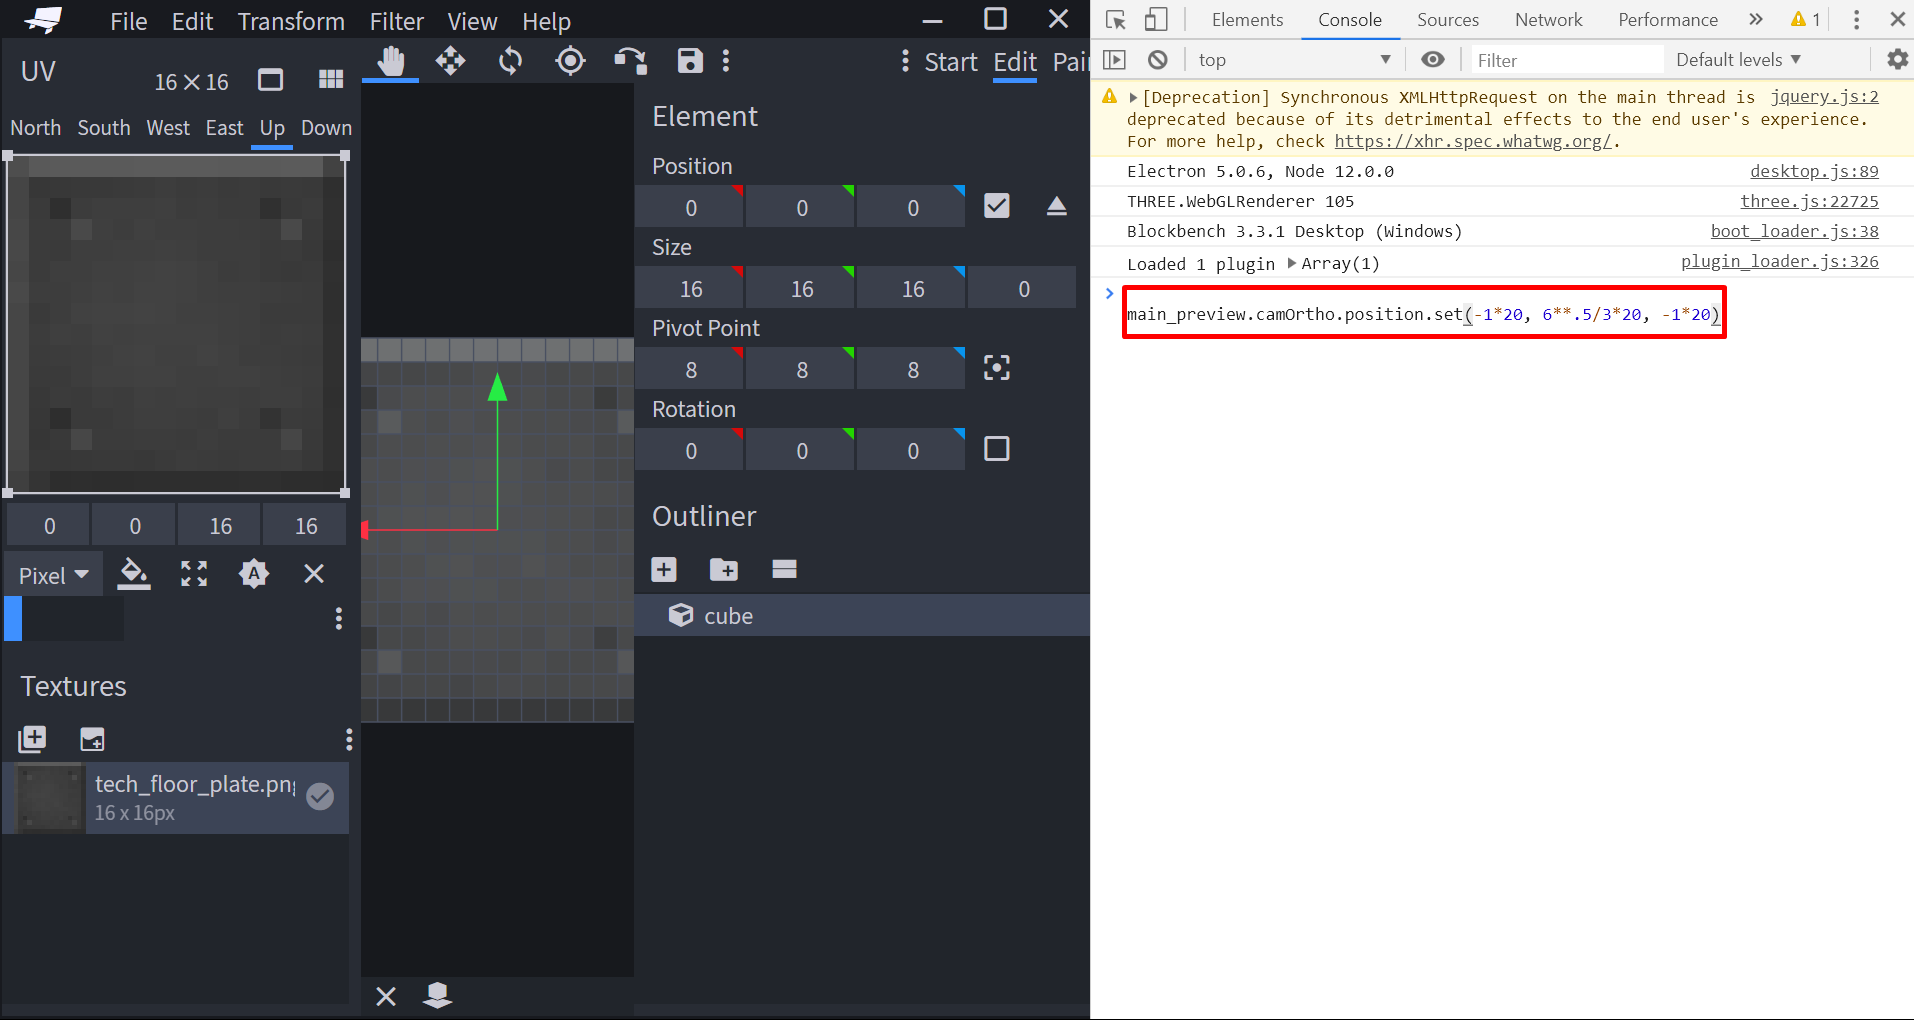
- Next, the rendering is started by changing the perspective of the Blockbench Camera. You would right click on the background of the program, then select "North" as the perspective.
- Finally, the Blockbench Camera can be used to precisely render the image. We do this by first opening the Blockbench Console. The keyboard shortcut is
Control + Shift + I. - Next, the command
main_preview.camOrtho.position.set(-1*20, 6**.5/3*20, -1*20)is pasted into the console and executed with the Enter Key. - The final render would be look like what is shown below.
Rendering after Blockbench 3.5.0
In version 3.5.0 and later, Blockbench adds the ability to create isometric views natively, so there is no need to use the above methods (though it will still work)
- Right click on an Empty Space so that a submenu will show as follows:
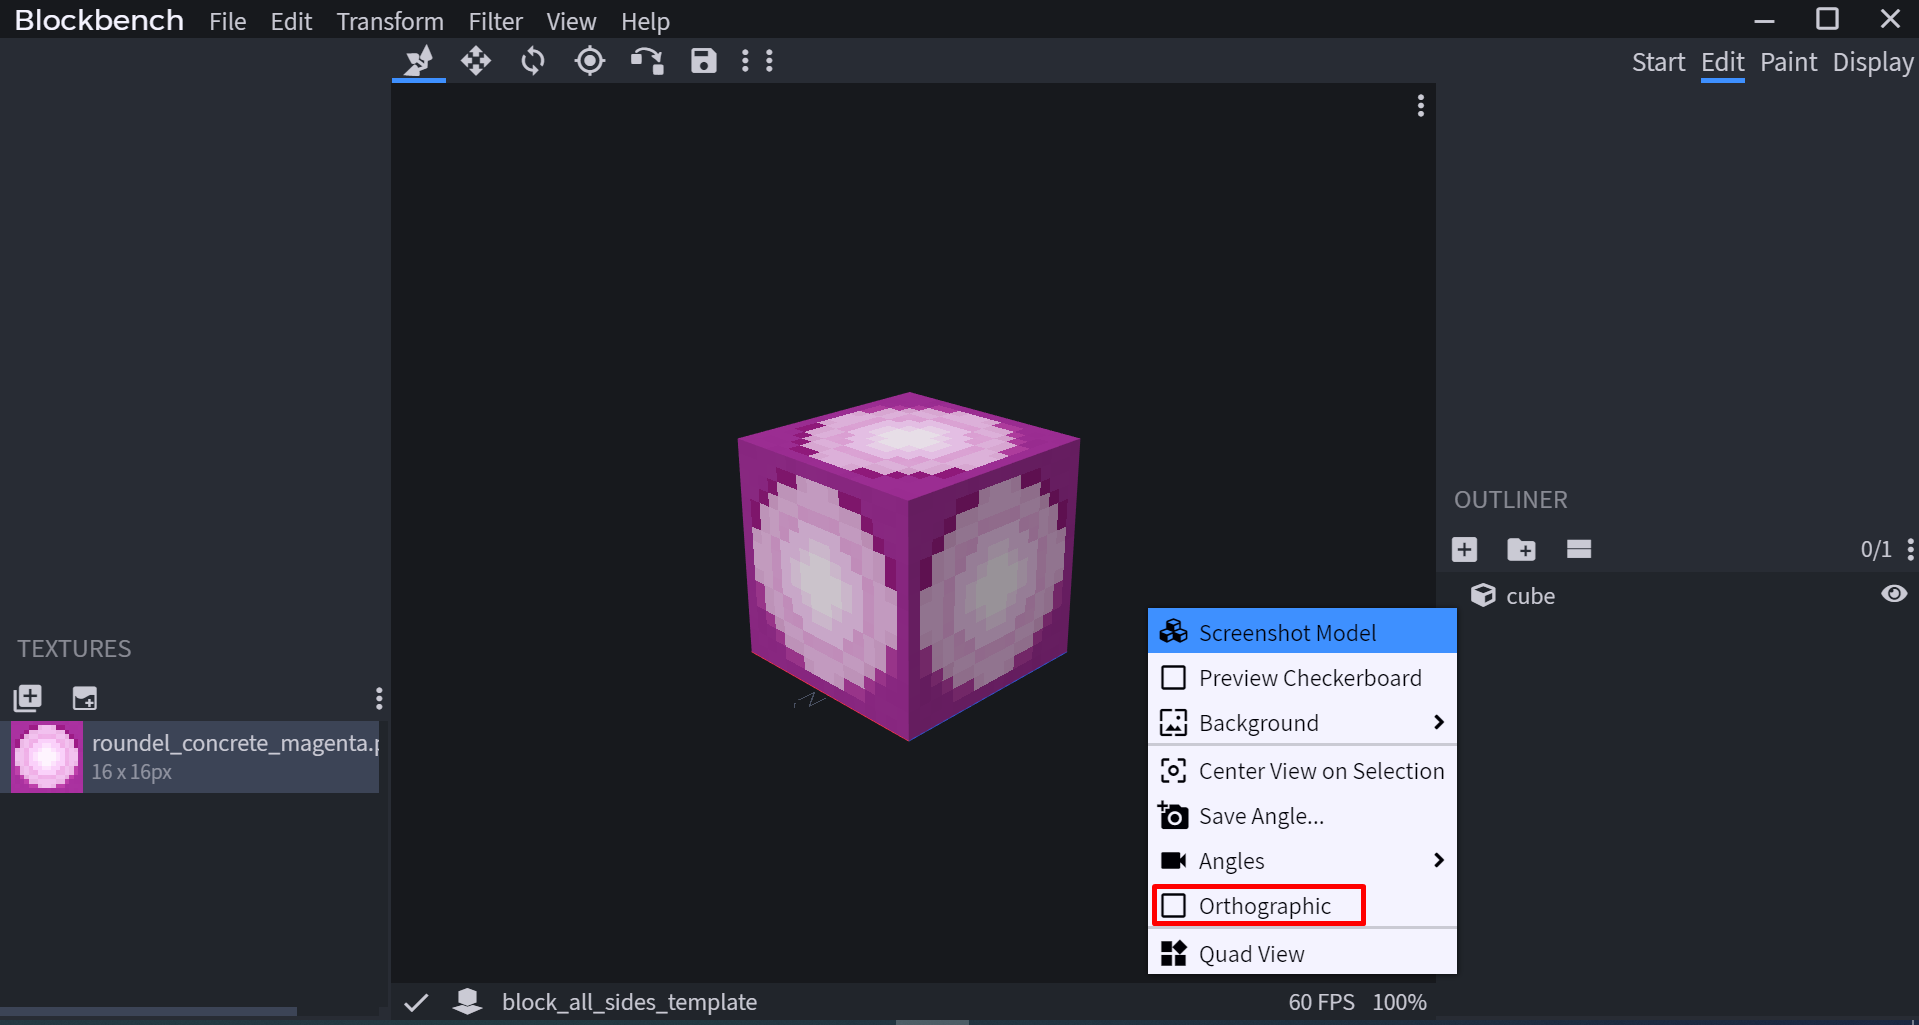
- Click on the Orthographic Option.

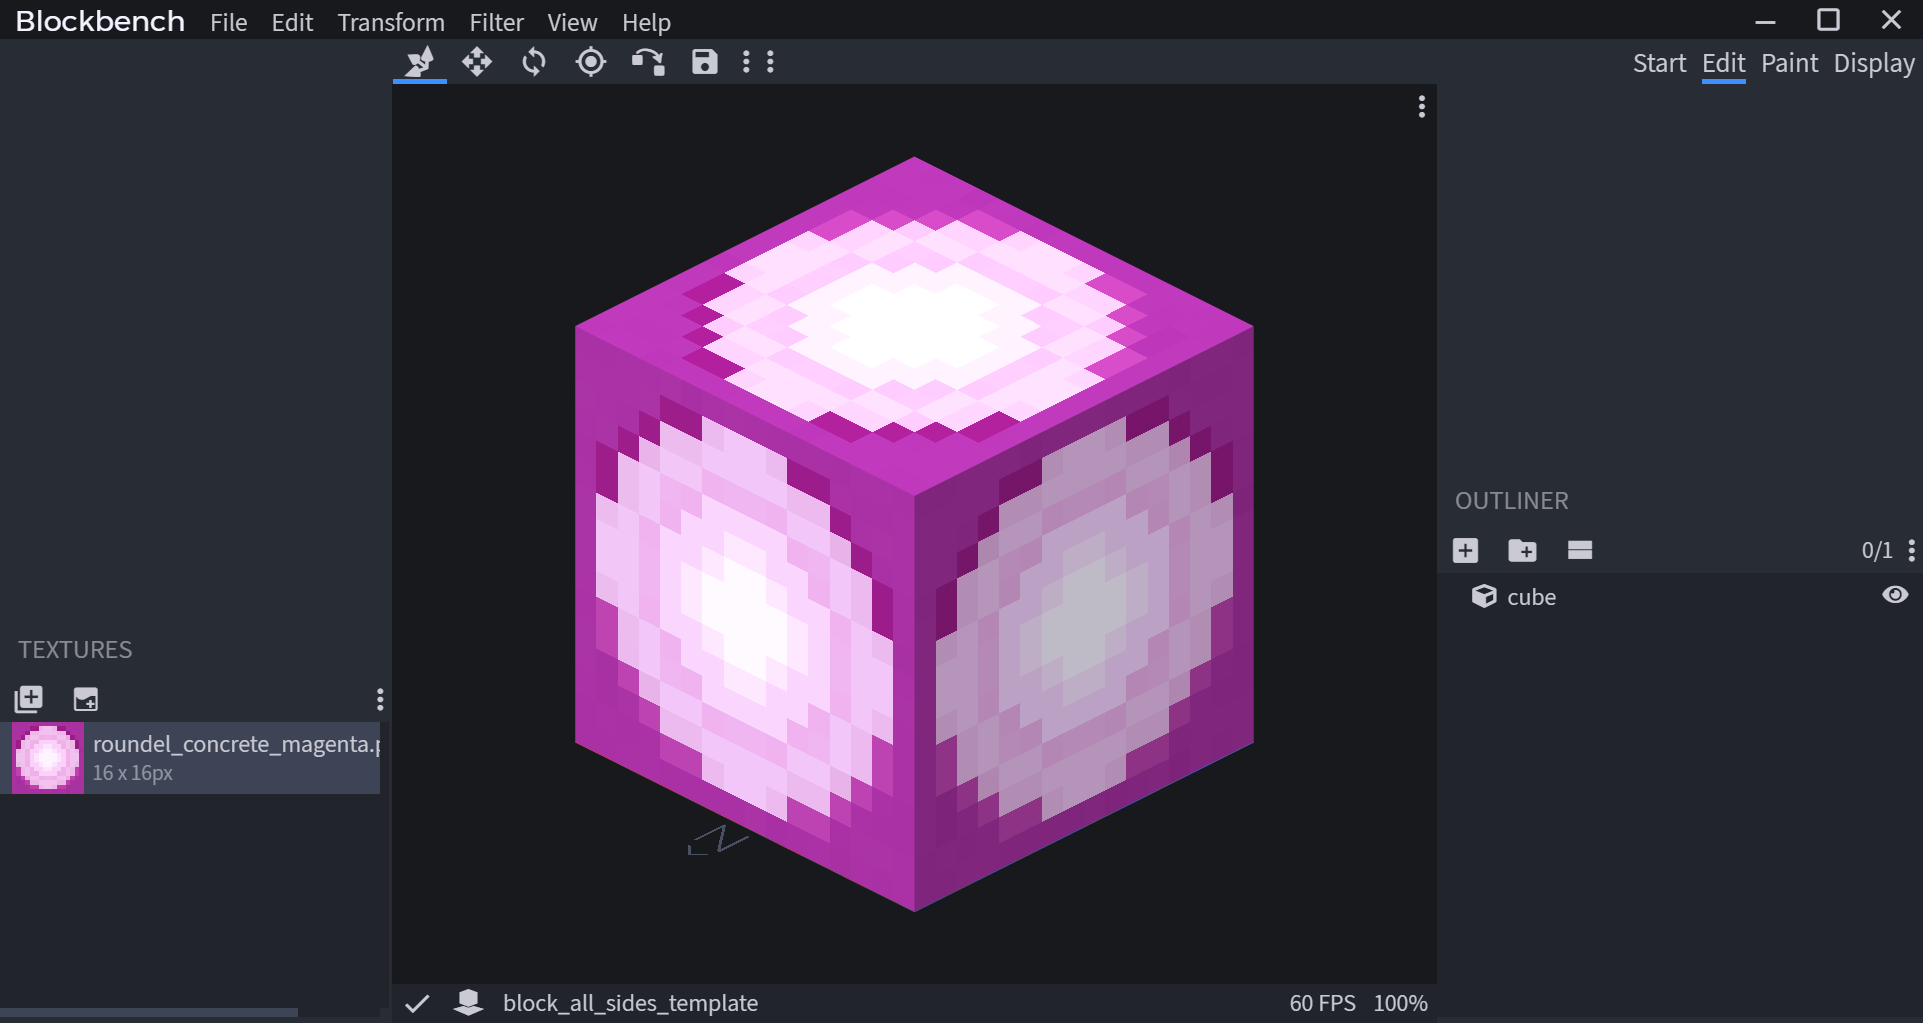
- Your model is now automatically rendered in an orthographic angle.
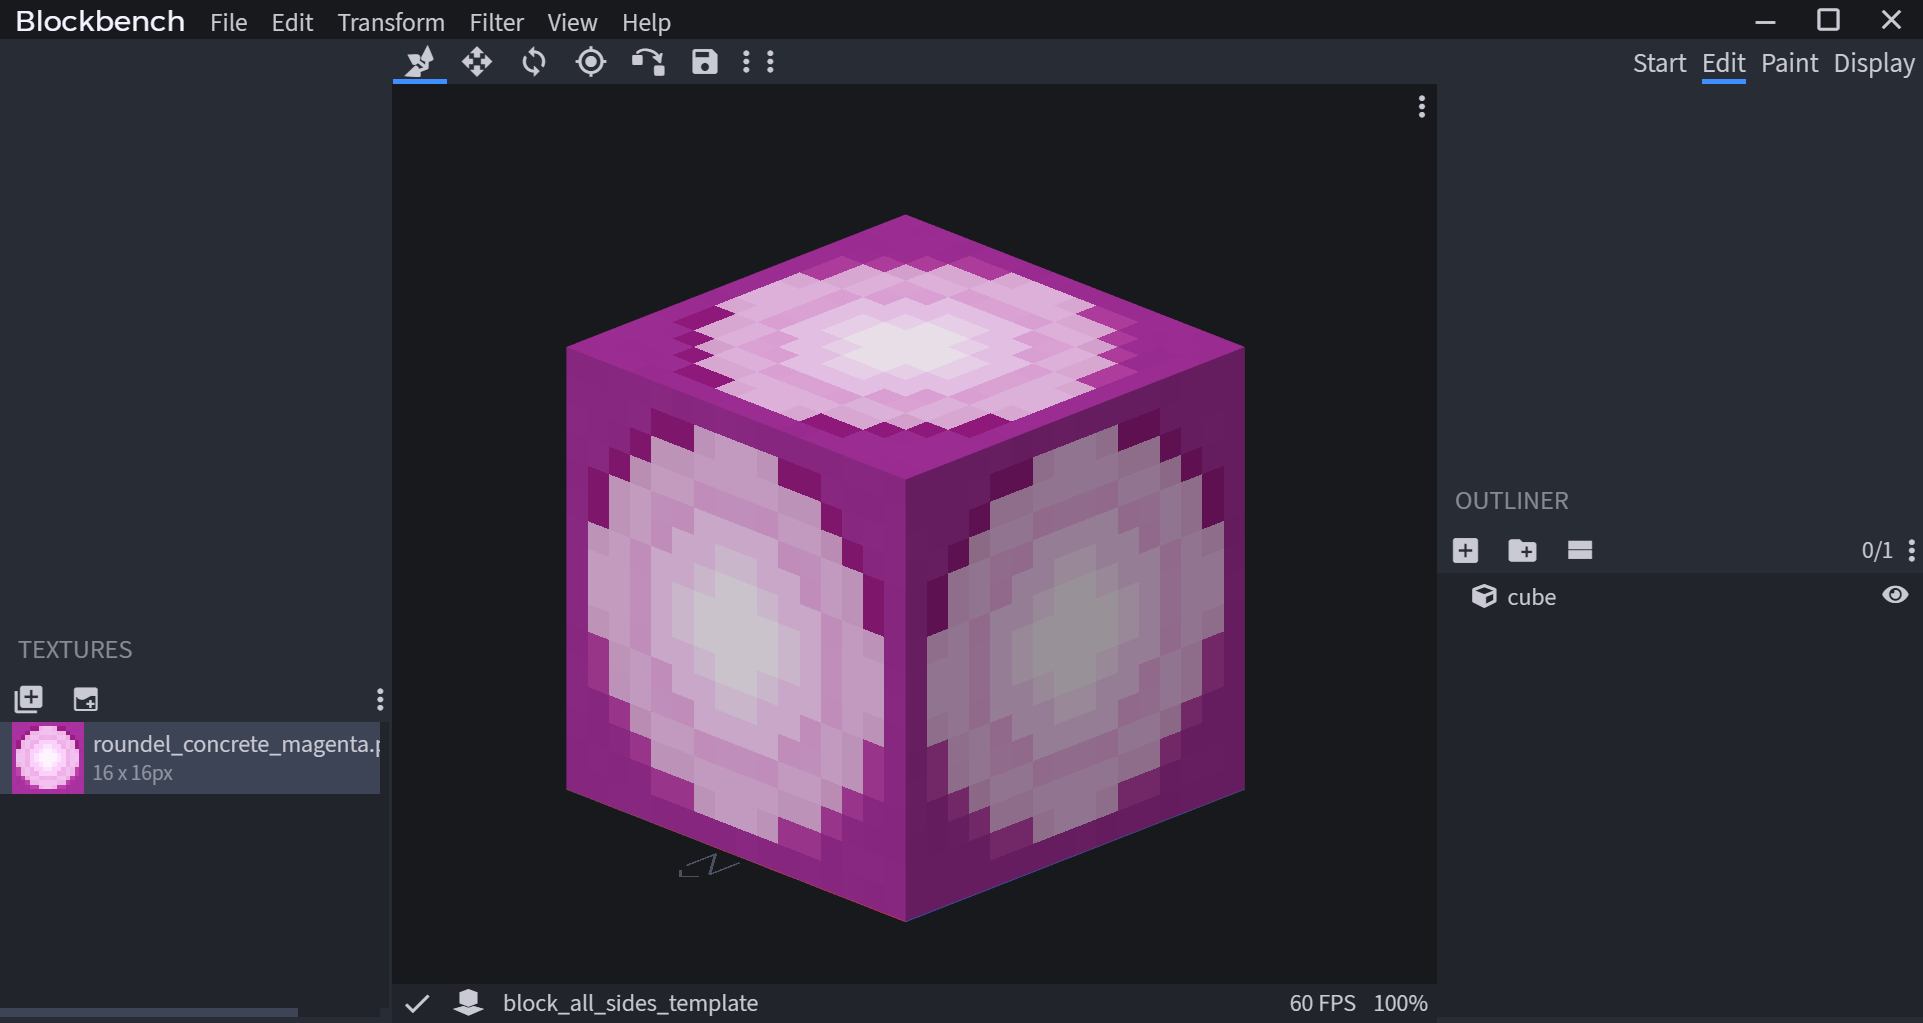
- To make the model show in an Isometric view, right click the empty space to bring up the submenu again
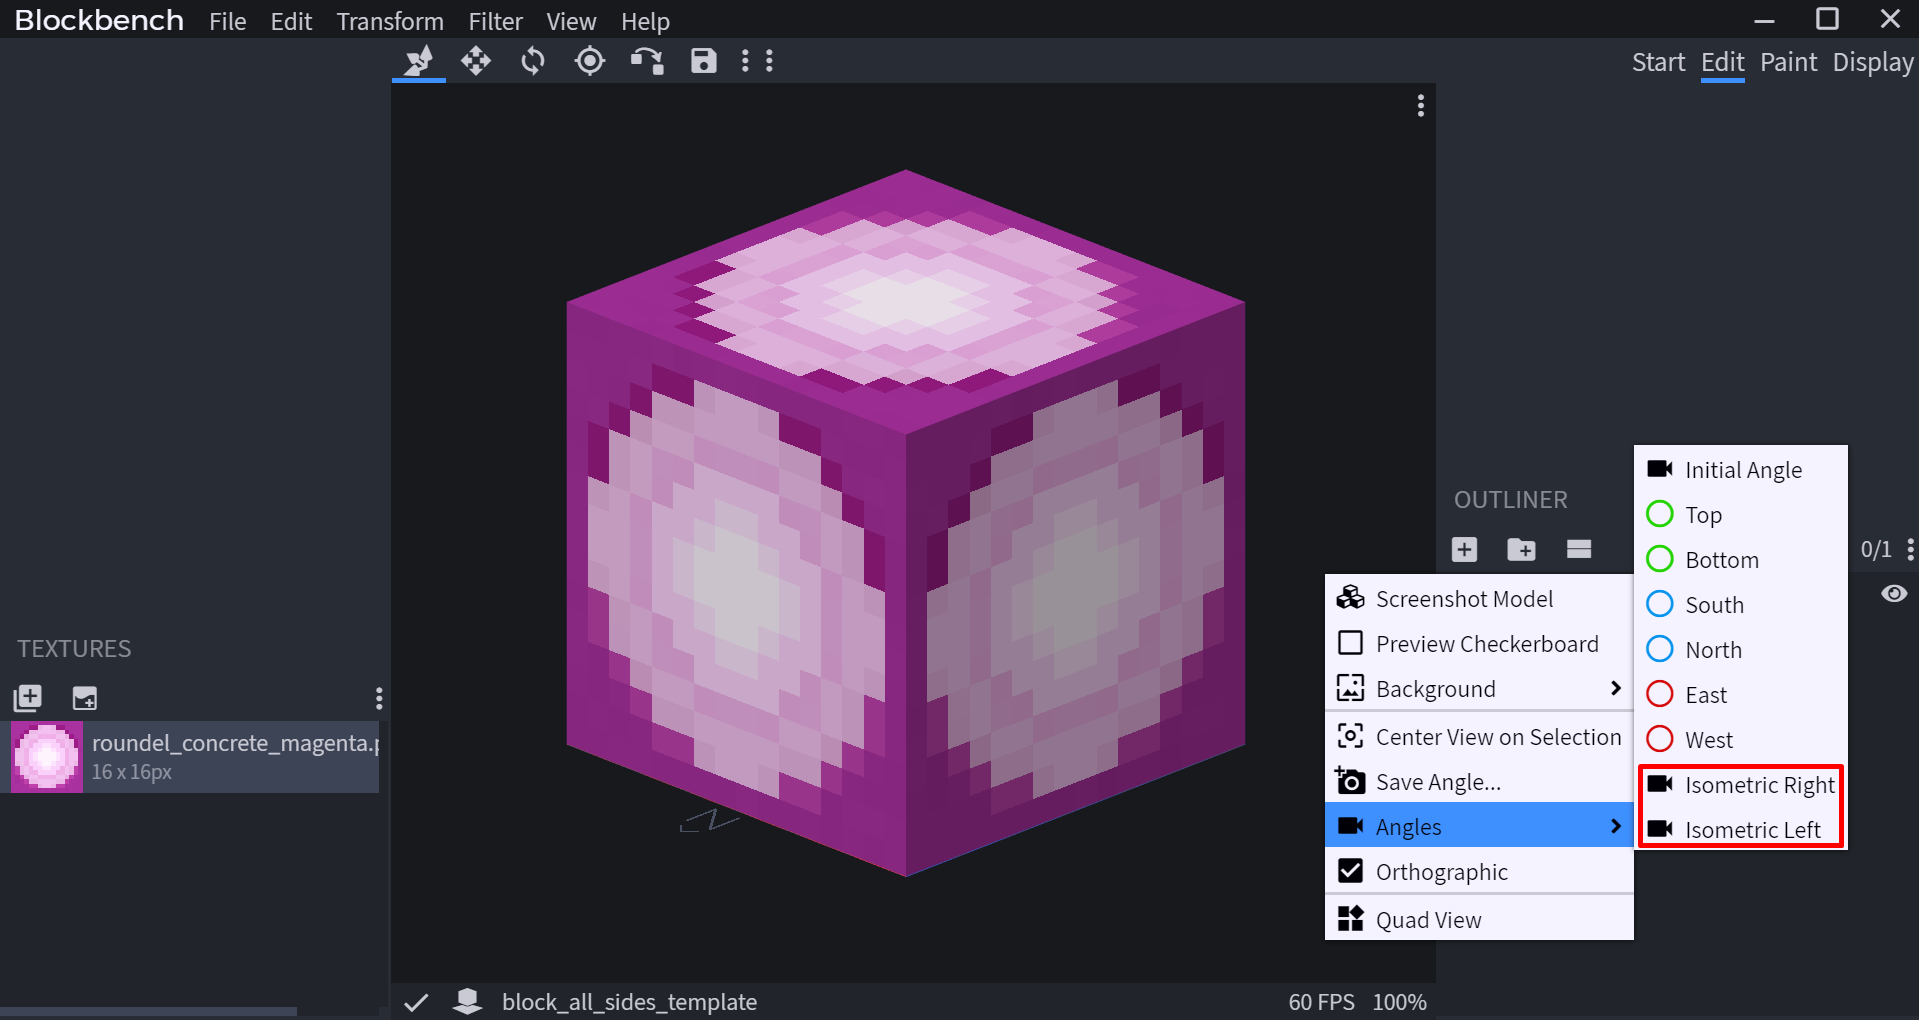
- Choose between Isometric Left or Isometric Right. The lighting will differ depending on the option you choose
- Isometric Right
- Isometric Left

- To take a screenshot of the model, use View > Screenshot > Screenshot Model
- Save the image file to a location of your choice.


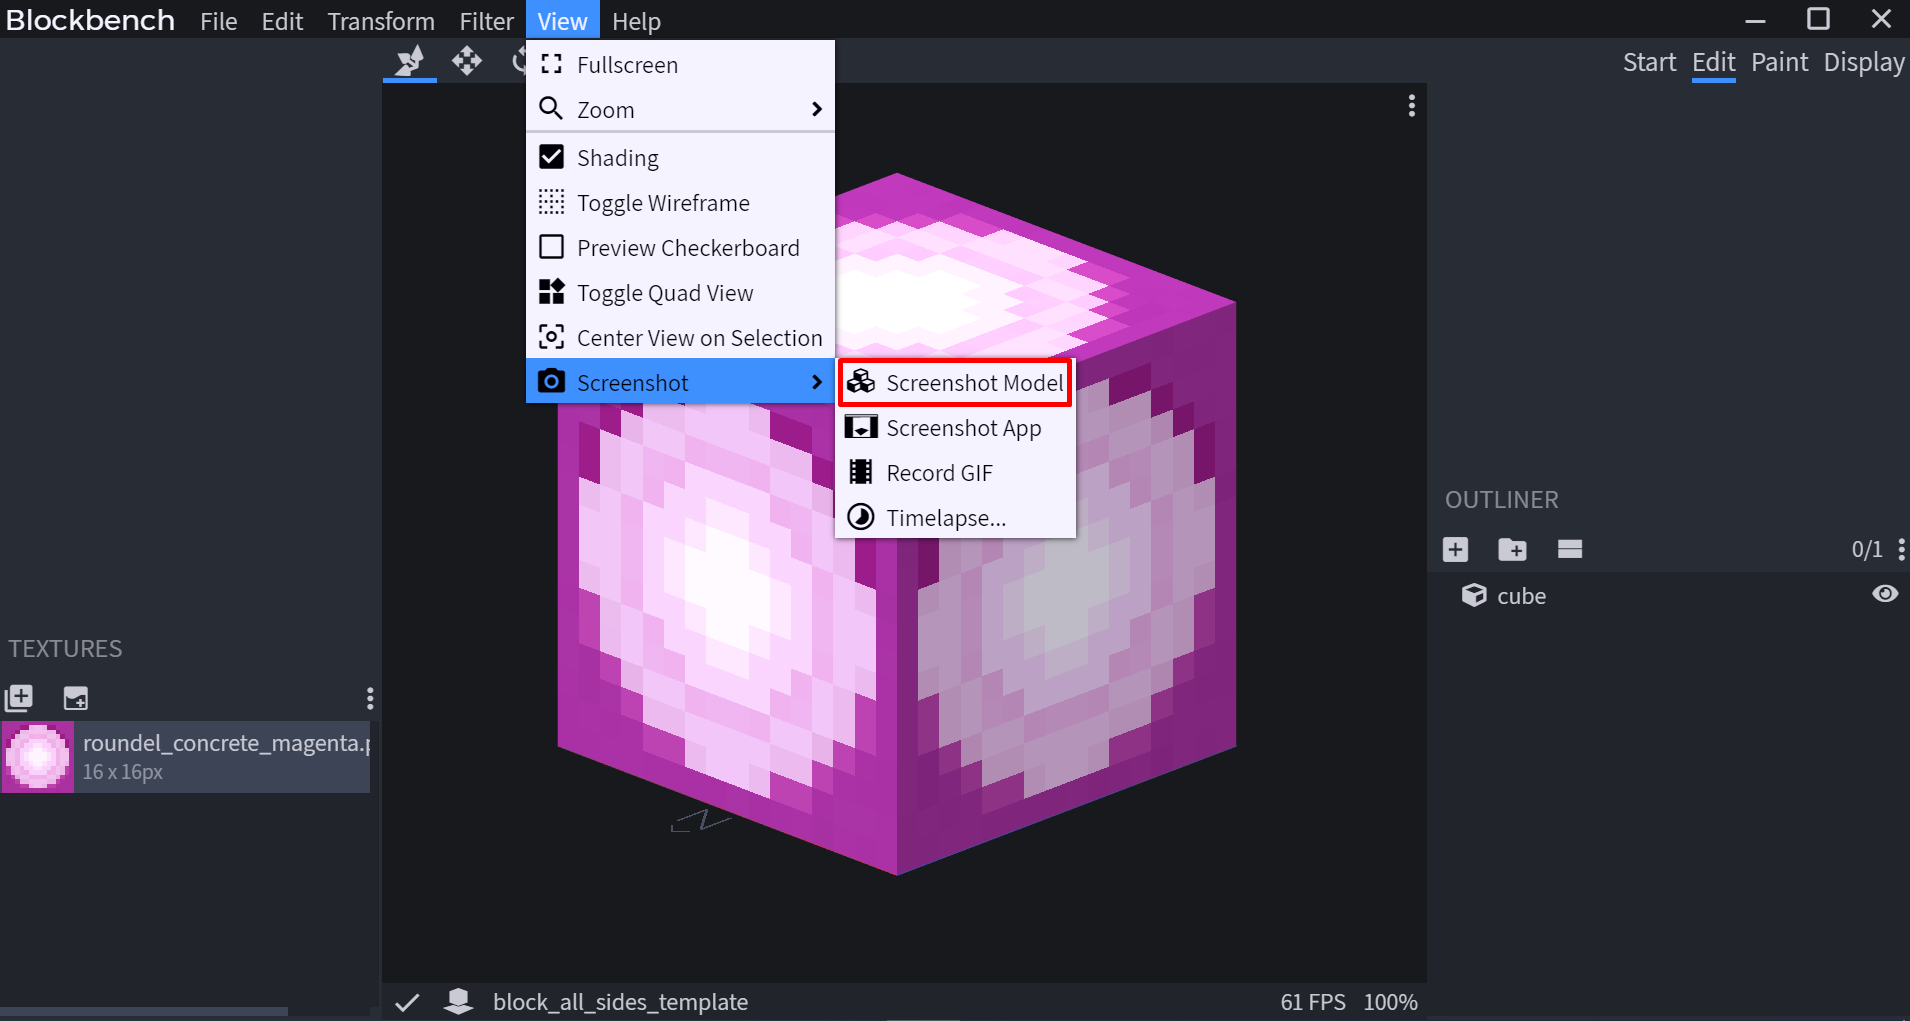
Screenshot
Finally, a screenshot is taken using the Blockbench inbuilt Screenshot feature. This ensures the rest of the program is not shown, only the model is in the frame. We save this image to a desired folder.
Troubleshooting
If the model clipping through the camera, we multiply each coordinate variable inside the main_preview.camOrtho.position.set(-1*20, 6**.5/3*20, -1*20) command with our preferred distance.
- E.g: (-2*20, 6**.5/3*20, -2*20).
To scale the model, we can enter main_preview.camOrtho.scale.set(xScale, yScale, zScale) in the console.
- E.g. main_preview.camOrtho.scale.set(1,1,1) is the default scale
- E.g. 2 main_preview.camOrtho.scale.set(0.5,0.5,0.5) would allow the camera to zoom in
- E.g. 3 main_preview.camOrtho.scale.set(2,2,2) would allow the camera to zoom out
Blender Render
The method used to render blocks in Blender allows for blocks to have a preset border around the image of the block.
The below two images compares the difference in rendering - on the left is a block rendered using Blender, and on the right, a block rendered with Blockbench.
More information can be found at the Official Minecraft Wiki - Standardised Views.
Items
Items are rendered in the same method as rendering a Cube Block in Blockbench. Instead of creating new models, the original json files are opened in the Blockbench. The camera transformations are applied in the same manner.
Modded Entities/Java Files
Entities/Java models are rendered in the same method as rendering a Cube Block in Blockbench.
However, Modded Entity Models use the .java file extension type instead of other formats used by Minecraft.
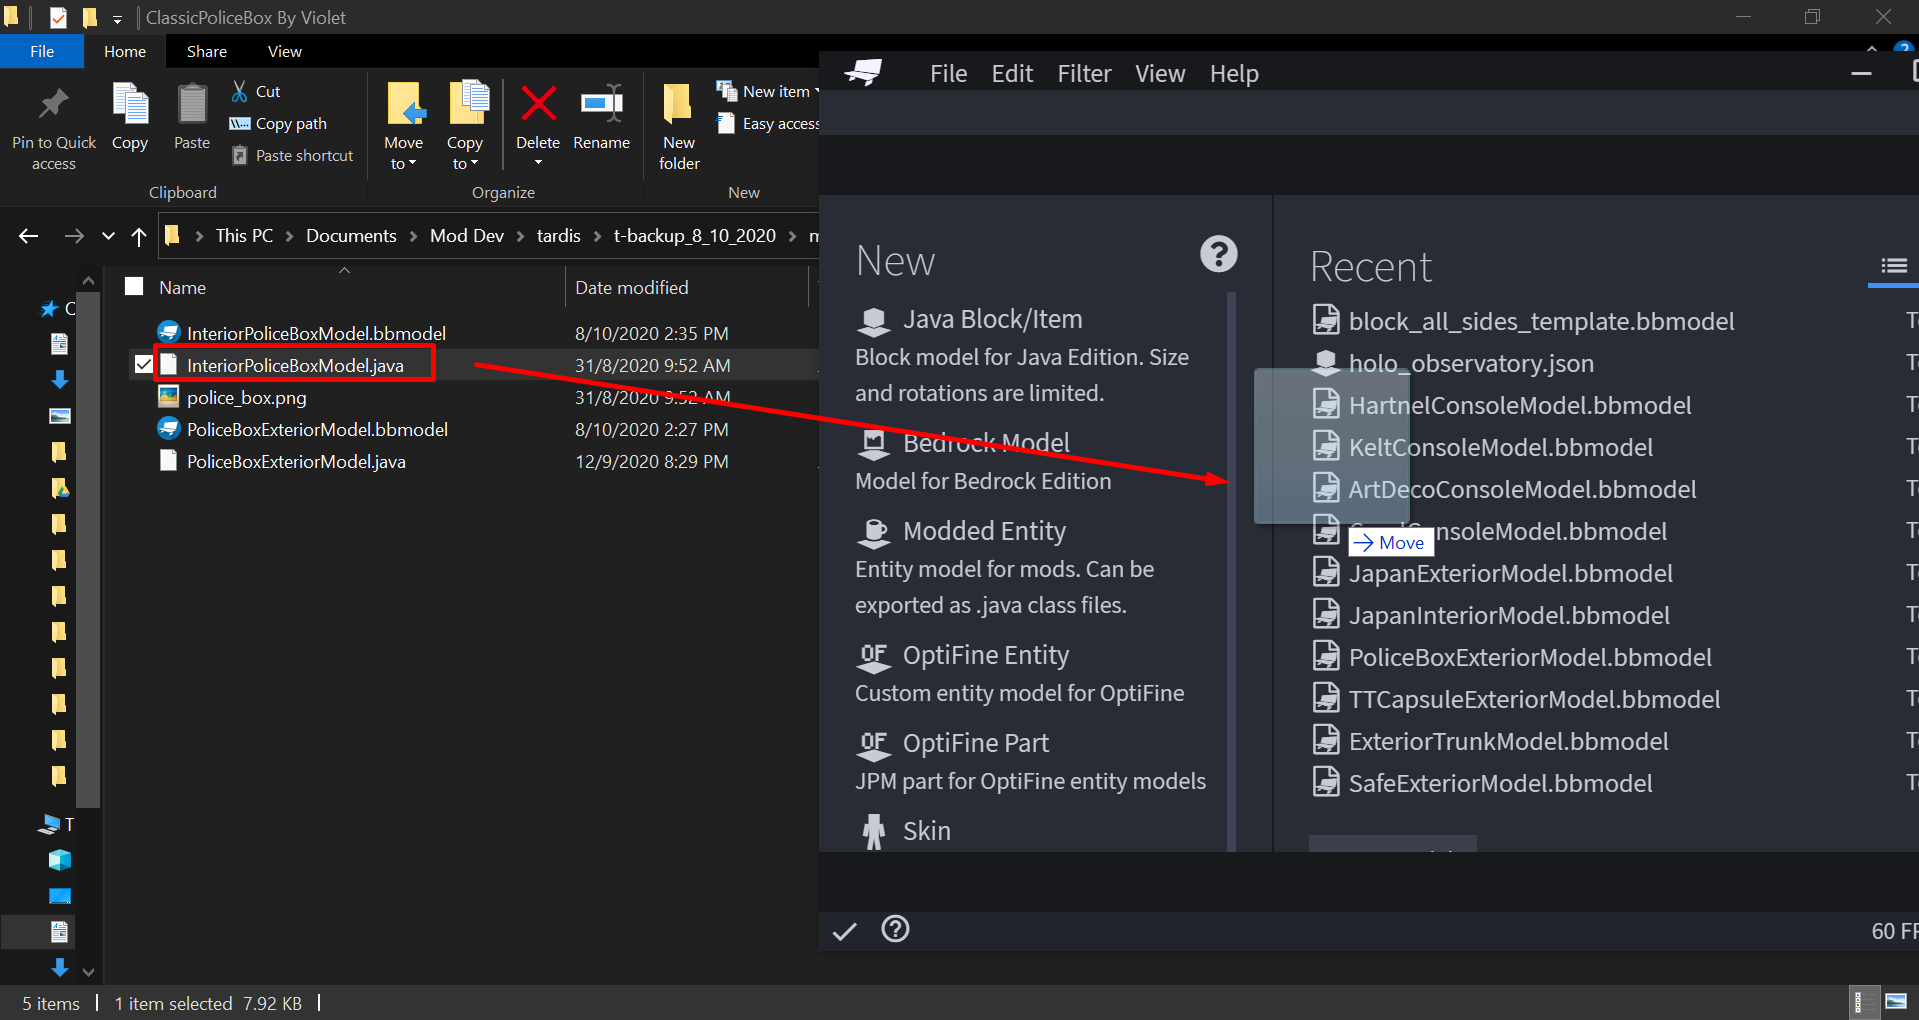
In Blockbench versions above 3.4.0, you can now directly import existing .java files and convert them into Blockbench models.
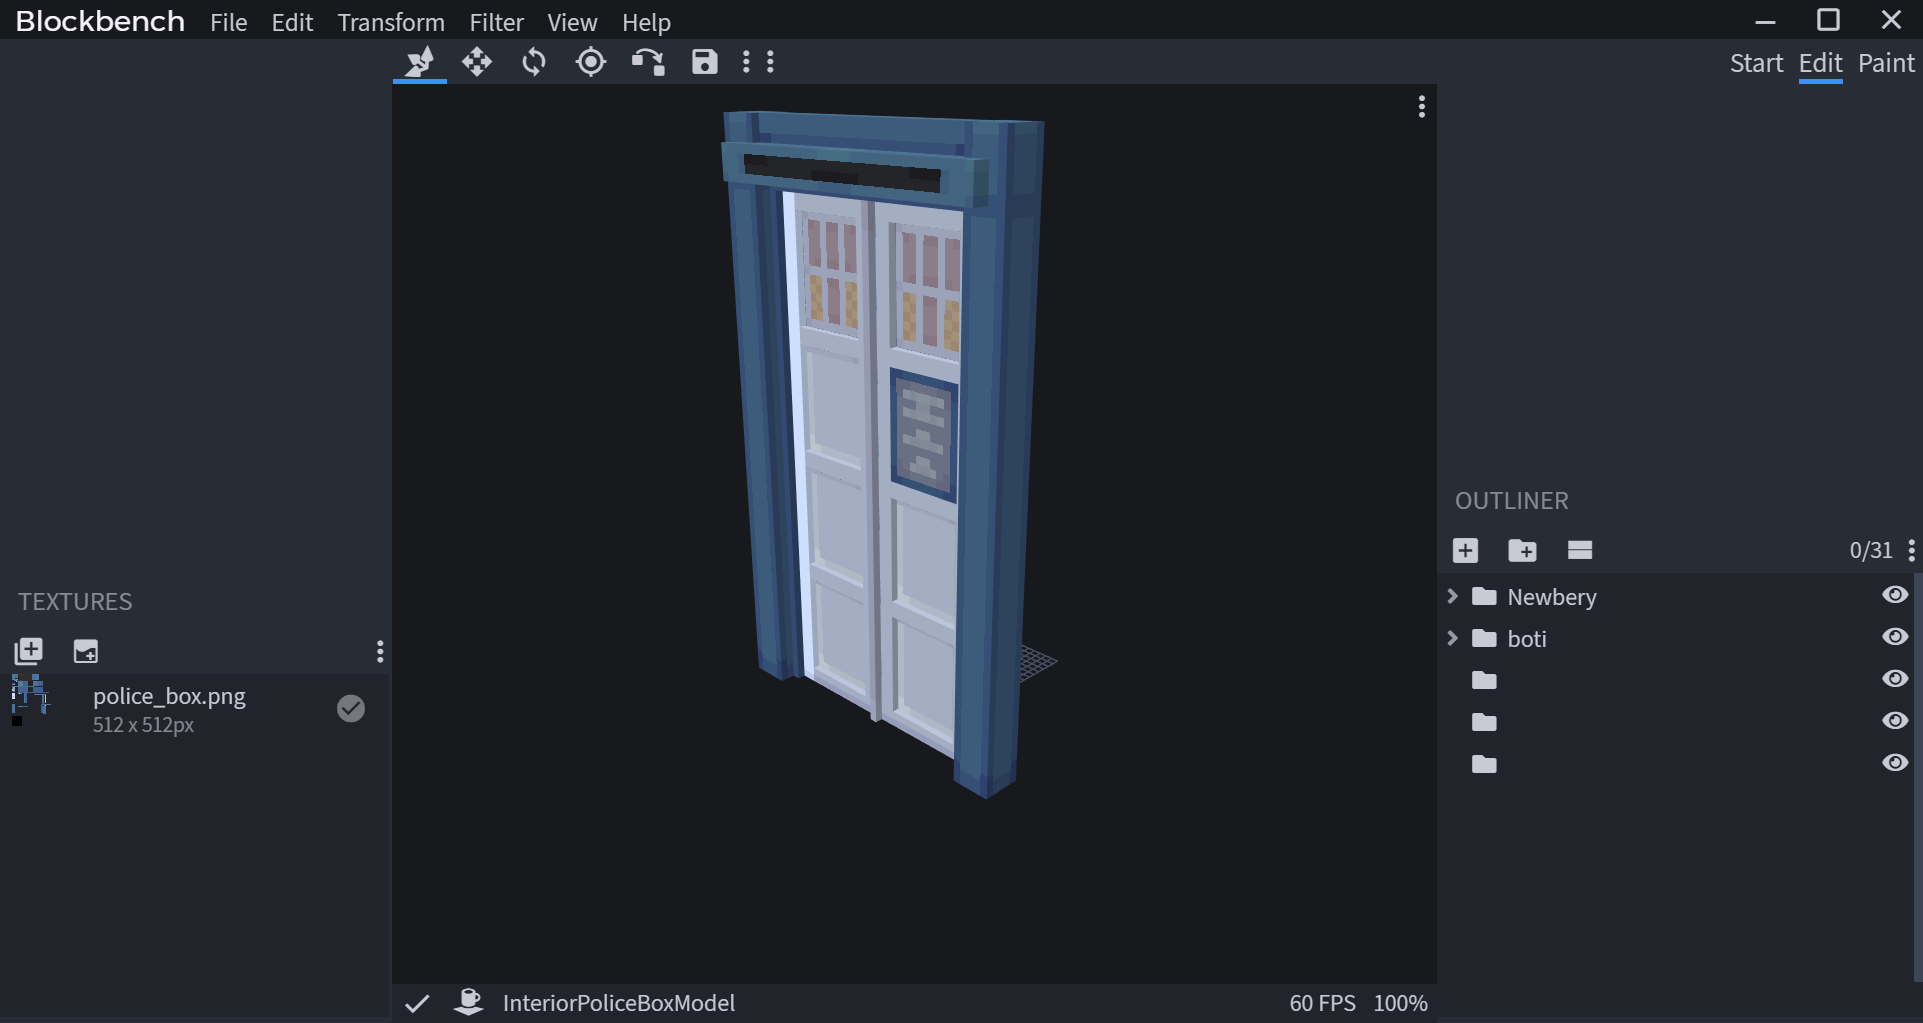
- Download a .java file that has was previously created. For this example, we will use an existing .java file that is used to create the Police Box Interior Door Model.
- To open .java models in Blockbench, simply drag and drop the .java file into Blockbench
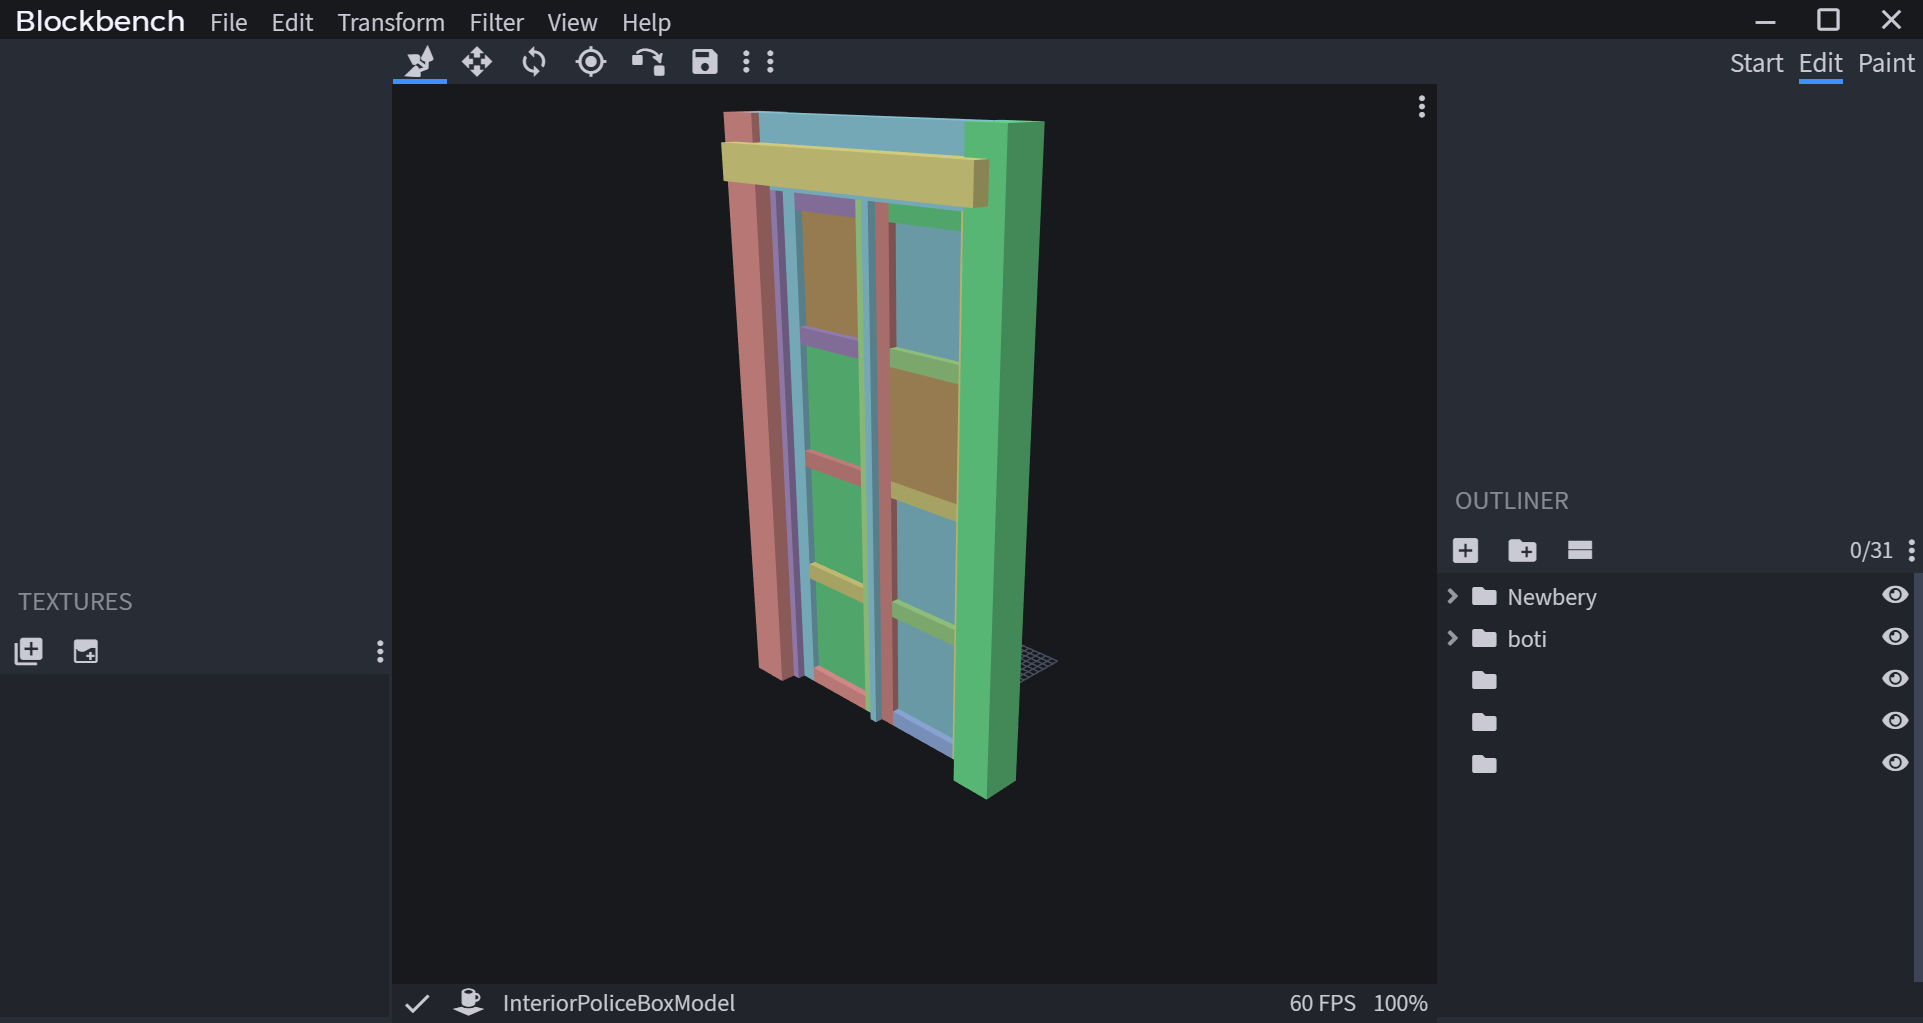
- Assuming the java file was setup correctly beforehand, the java file will be now converted into a model you can use. However, we are still missing the texture file.

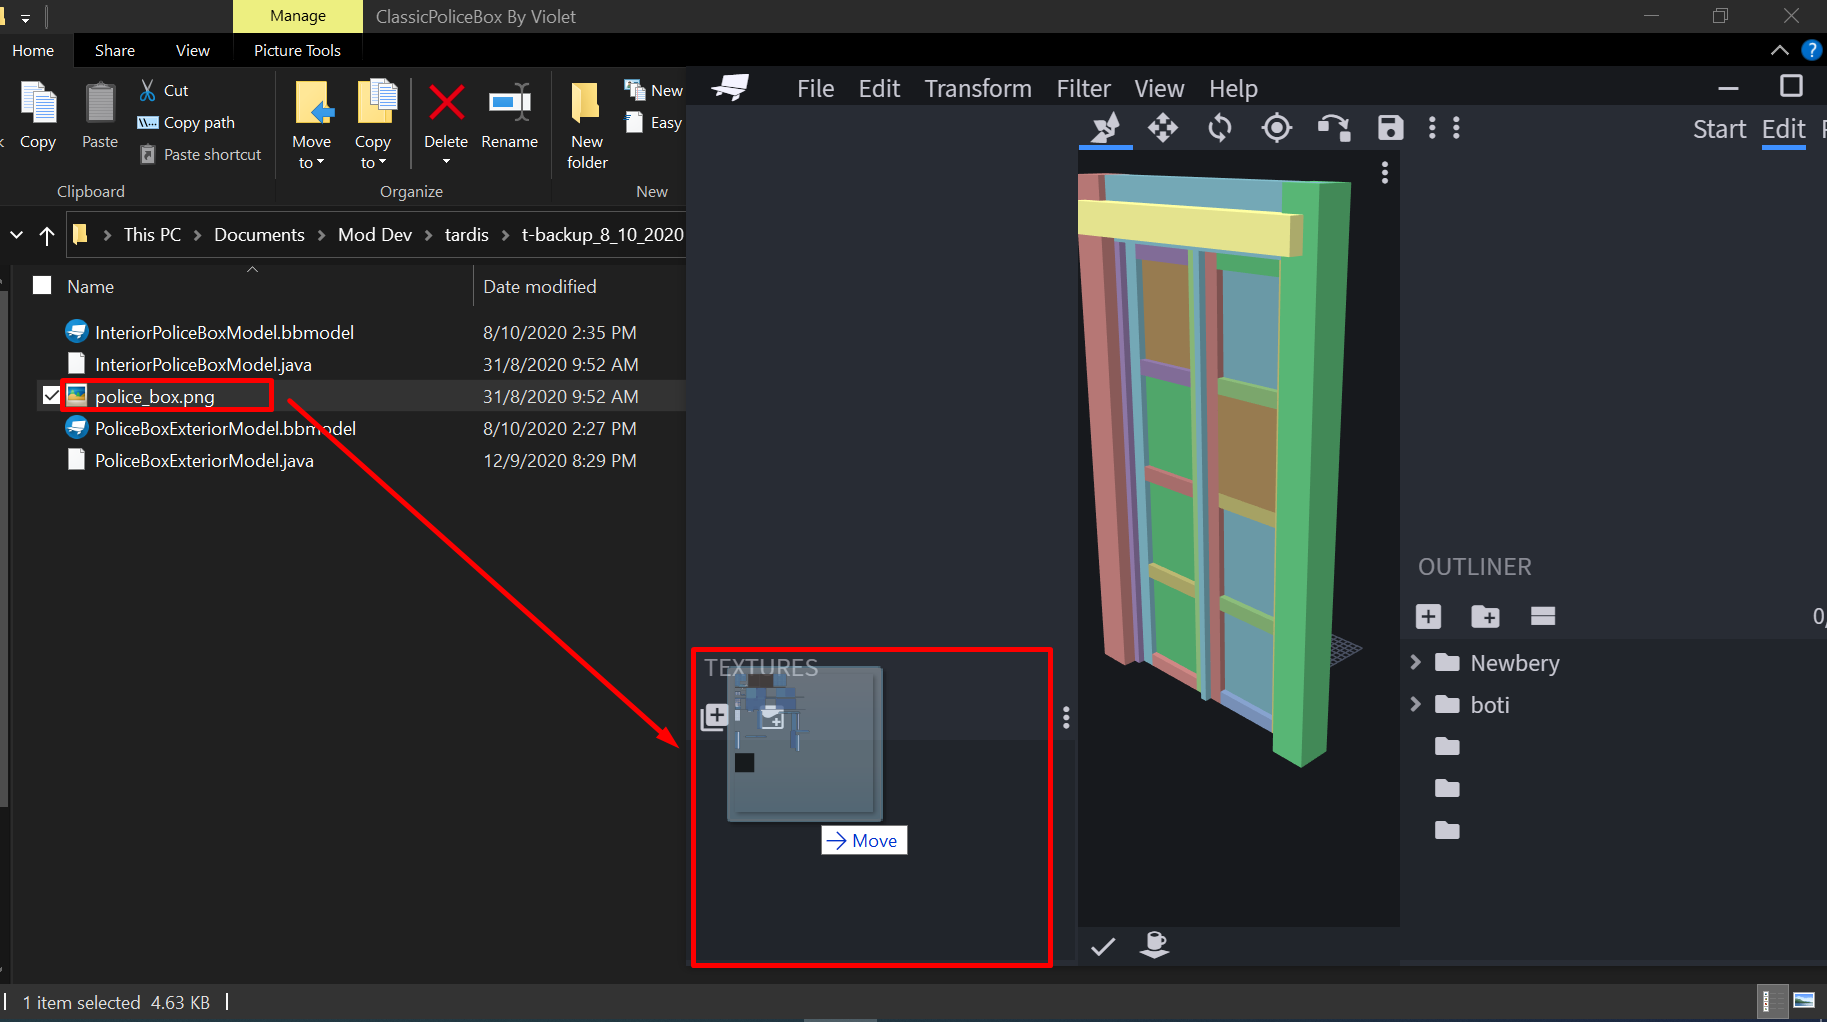
- To fix this, drag and drop the correct texture file into the "Textures" section of Blockbench as shown.

- Once this is done, the texture should automatically apply to the model.
- Check if the model is displaying correctly. Once satisfied, follow the earlier steps of rendering the model to isometric view.


Note
If you are not using Tardis Mod java files for wiki documentation purposes, we would appreciate it if you could ask for permission to use these assets. This is because the mod uses the All Rights Reserved license, meaning the mod authors have full control over how their assets are being used.
For more information about this, please contact the mod authors.
Graphical User Interfaces
Graphical User Interface (GUI) screenshots are created through a combination of cropping in-game screenshots or editing the original GUI texture.
Using Original GUI Textures
Sometimes, it can be easier to use the mod's original GUI texture files, then scale the image up.
GUIs with in-game widgets
Using and Processing in-game screenshots
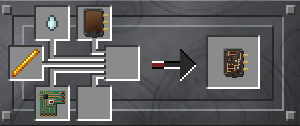
At other times, the GUI featured in the mod can involve widgets (buttons, textboxes etc.) that can only be captured in-game. In this situation, we can choose to open the GUI in-game, then crop and remove background.
To crop and remove background, reliable tools are Paint.net, Gimp or Adobe Photoshop.
Paint.net and Gimp are free tools, while Adobe Photoshop requires a paid subscription.
Screenshots
Recipe Screenshots
Please crop recipes so that only the relevant information for recipes are shown.
Examples of recommended formats:
 |
 |
| Image is cropped and background removed. If generated by the JEI Mod, it may be useful to display the Recipe Category to clarify what block uses this recipe. | Image is cropped to only includes relevant items for the recipe. Background is removed. |
Ingame Screenshots
Please use an optimiser tool such as PNG Gauntlet or similar online tools to reduce the size of your screenshots.
Minecraft screenshots are very large in size by default, so to save storage space, please take the time to reduce the size of your images.
GIF Images (Moving, repeating images)
GIF, or Graphic Interchange Format, is a file type that allows images to display a repeating set of frames, allowing for animated images to be used in the wiki.
However, these file sizes will be very large, so it is recommended to make the animation time as short as possible.
There are many ways to create these images. Two such methods detail ways of creating GIF image files.
Limited Time GIFs
There are readily available programs that allow one to create gifs without many external programs. The free program Gyazo allows one to create a 7 second GIF image which can then be shared using an automatically generated link.
The advantage to using this tool is that it is very easy to capture an event and easy to share. However, this tool only allows for 7 seconds of frames to be recorded, thus, files with a longer animation would require other tools.
Unlimited Time GIFs
One such method can involve using a screen recorder such as OBS Studio (Free for Windows, MacOS or Linux) or the Windows 10 Game Bar Recorder (Requires Windows 10 Operating System).
Then, the video file is trimmed to the desired length and can be converted to a GIF file using free websites. EzyGif is a free example website that allows for Videos to be converted into a GIF file.